Two Ship Attack Tactics
There are several major considerations when putting an attack together. We begin with the two factors that directly pose a problem to mission success… target defenses and weather. The lethality of the target defenses determines the number of attacks as well as the type. Weather can be a problem is restricting visibility… this has a direct impact on the lead’s ability to control his flight… and this then may limit lead’s options in building his attack plan.
Once the leader has considered the target and weather restrictions, then and only then can he turn to crafting the actual attack. In putting this plan together, the lead has to decide on attack formation, attack roles, and attack timing.
Attack Formations
There are three primary attack formations…line, wedge, and split. Each has plusses and minuses when we factor in target defenses, terrain, and weather.
Let’s discuss the first primary attack formation, line attack.
Line Attack
The line attack concept has the attackers in a side-by-side formation at the point of weapons release. This results in maximum ordnance on the target in a given period of time. This attack formation is excellent for large target areas such as truck parks and long convoys. Since flight path deconfliction is always a concern, we want the targets to be separated so that the two shooters don’t run into each other! A drawback of line attack is that both shooters are concentrating on their attacks and not checking six.
Line Attack Formation
Another limitation to line attack is that the formation is hard to maneuver in difficult terrain…line is easier to manage in relatively flat terrain. Also, if the weather has resulted in limited visibility, line may be more difficult to fly. Here is what the attack looks like in general. Threat level permitting, we’ll depart the southern IP (B602) and make a line attack up the relatively flat river valley, using the city of Corby as a bump point. Here I have the flight egressing opposite each other to split the threat.
Line Attack Map
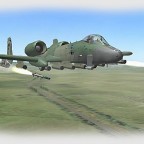
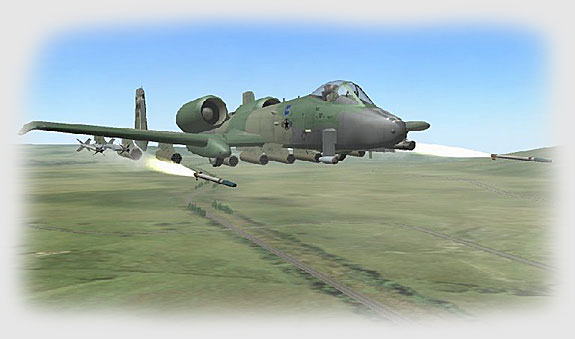
(click on the above for the full screen image)Line is best suited for gun and Maverick attacks. If planning a pop-up attack to a dive bomb delivery, you may want to consider the “split” tactic (to be covered later). Gun and Maverick max range is really a function of target acquisition and identification…in the real world, you can count on maximum gun range being no more than 2nm…and that’s against lightly armored targets. To kill a tank, you’ll need to get closer. Seeing the target also limits Maverick range…so use about 5nm as the number (the Maverick missile video is magnified so you can double the 2nm gun range). So for line gun and Maverick attacks, expect your action points to be about 2nm and 5nm respectively.
Let’s stop right here for a moment and talk briefly about altitude and airspeeds. This article assumes a high threat, European-type scenario, typical of what we dealt with in the 1980s. European terrain varied from relatively flat in northern Germany to hilly areas in the central and southern parts of the German border. The Hog is a slow beast to accelerate when loaded up with Mavericks or other external stores…we typically got about 300-350KIAS out of the jet on a good day. Don’t believe that hoopla you may see about the jet’s top speed of 400+…that’s a marketing number that you’ll only see going straight down in a power dive! At normal ingress speeds, you’ll cover about a mile every 10 seconds…keep this rule of thumb for later when you consider actual attack planning.
In this European scenario, we flew at low altitude. In this context, “low” meant below 300’. 300’ might have been ok for navigation to the target area…going below that made navigation more difficult since you saw less of what was coming up and going by…and the threat of ground collision siphoned off your concentration to the point where at 100’, nearly all of your time was spent on not hitting the ground. At 100’, checking six and navigating over unfamiliar terrain become very tough to do.
So…for high threat, low altitude ops…plan on navigating at about 300’ and 300kias…in the attack itself, you can drop down to a lower altitude as conditions permit and push it up to max speed (but don’t hold your breath!). Think 300/300 and you’ll be OK! Now…back to the actual attacks…
We were talking about the line attack. The lead departs the CP and navigates to the IP…the attack begins from the IP. At the IP, the lead radios that he is departing the IP…this is for the wingman and the FAC if one is being used…and the lead orders the wingman into line if needed. Because of its relative unmaneuvaribility, line attacks tend to be “straight in affairs”…the lead departs the IP on a heading and maintains that approximate heading all the way to the action point. From this, you may assume that terrain masking is not an item of special emphasis.
Outbound from the IP, the wingman concentrates on holding his line position and monitoring lead’s navigation…which leads me to digress again!
Unlike in some other fighter types, the A-10 wingman is expected to maintain a high sense of situational awareness (SA). This means that the wingman needs to keep up with what’s going on…primarily navigation. The Hog wingie has his map out and is following the route of flight at all times. There is little “welded wingman” philosophy in Hog ops…”welded wing” means the wingie maintaining his position but contributing little else to the flight. In the Hog, the wingie is expected to be a thinking member of the flight, ready to step in with whatever help the lead may need. So, if you are the wingie, leave the “fat, dumb, and happy” mentality in the o’club…once you strap the jet on, you’re a 100% player!
Ok…sorry! I had to get that plug in because our Hog tactics require a very strong sense of mission involvement from all flight members. Back to the line attack!
Your separation in a line attack is the same as before…about 4000’-6000’ and + or – 10 degrees off the 3/9 line. As in any formation, the wingie stacks level to slightly high off lead…doing so helps insure the wingie doesn’t inadvertently hit the ground. But the ground is still a major consideration, so the wingie in the line attack should concentrate on his 12 o’clock and only crosscheck his lateral spacing and alignment…and take a peek at the flight’s six every so often as well.
Why? Because in doing so, the wingie can also help navigate, check for threats in the target area…and most importantly, acquire and prioritize his target. This means the wingie should acquire the target area and then isolate a target on his side of the target formation. He does not want to accidentally focus in on a target on the lead’s side because of the impending flight path confliction that may arise with the lead.
Either flight member should call the first tally of the target, noting range and clock position off the flight’s nose…such as “Tally ho! Two has the target at left 11 o’clock, 5 miles”. While either flight member can call the tally, the flight lead still controls the flight…if the wingie calls the tally, the lead must confirm that sighting before the flight can attack. In the case described, the lead should then look for the target and call either “tally” or “no joy”. If “no joy”, the wingie should continue to provide directive info to the lead. As a rule, wingie’s do not attack without clearance, although the lead may brief this in specific instances. If the lead does not get a tally in enough time to meet weapons parameters, then he may well be advised to “hook out” and return to the IP for a reattack. A “hook out” is a 180-degree hard turn…in other words, a retreat!
Why the trepidation? Why not give the wingie the lead and let loose the dogs of hell? Well…there may be a time when such a thing could happen. The lead may know that the bad guys are the only act in town. But in a CAS situation, this may not be the case. Any time there are friendlies around, the wise lead maintains a firm grasp on his flight. He does not want any “short rounds” ( a “short round” is an inadvertent release on a friendly position…these days we call these “blue on blue” or “friendly fire” incidents). So the wingie’s responsibility is to check 6, navigate, and check 12…and talk the lead’s eyes on the target.
So much for the what if’s…let’s assume the lead has the target area in sight. He calls it out…the wingie calls the tally as well. The next thing to happen is for the flight to reach its action point…the bump up point to unmask and set up for the gun or maverick weapon release. At the action point, the lead calls “up” and begins a shallow climb. As lead unmasks, so does the wingie.
Both are now focusing entirely on target selection. For both a gun or Maverick attack, now is the time for each shooter to assess the target array and select his target. The rule of thumb is AAA first and targets second, assuming more than one pass is anticipated. Each Hog driver scans his area of responsibility for threats…ZSU’s, for example. RWR volume is up high enough that the pilot won’t tune it out in all the excitement. Pods are nice, but an eyeball on the threat is better. Hear it, see it, kill it. Hear it, don’t see it…hook out to reconsider the problem. Do not drive into an audible threat environment without a tally on the threat! Killing a truck at the expense of your wingie or lead is not an acceptable trade-off.
At some point, we’ll have to break off the attack. Normally this is after taking your shot…but it could be before. How? When a flight member sees an unobserved threat to the other flight member. Or in the case of target fixation…you as the lead have taken your shot but notice the wingie continuing to bore in. This is not unusual, particularly in Maverick attacks. Sometimes getting a Maverick lock can be a challenge, and it’s easy to get all wrapped up in the TVM…and lose SA big time. This is when the other flight member steps in and calls off his buddy…”Two, jink out now!!”.
Whether you break off on your own after shooting or are called off, the direction you go is up for grabs. Some flight leads pre-brief this as a matter of personal preference. In a line attack, some like for the flight members to break away from each other…one goes left, the other to the right. The idea is that this compounds the enemy aiming problem. Others want the wingie to break away into the lead who will break to the outside. Breaking away can cause the flight to lose sight of each other…and breaking the same way can draw enemy fire towards the flight in a greater concentration…it’s a flip of the coin. Personally, I favored the opposite break in a gun attack and went with the break into method when at the longer range of a maverick attack. In any case, the lead and wingie call the direction of their break…”One’s off left”.
Line Attack Egress Options
OK…that’s the line attack. A number of the conventions I discussed, particularly the egress options, will apply to the other types of attacks as well.


Related Posts:
Related posts:
 Hog Basics: RAF Bentwaters Tactics Guide, 1982
 Page 2
Hog Basics: RAF Bentwaters Tactics Guide, 1982 Page 3
Hog Basics: RAF Bentwaters Tactics Guide, 1982 Page 4
Hog Basics: RAF Bentwaters Tactics Guide, 1982 Page 6
Hog Basics: RAF Bentwaters Tactics Guide, 1982 Page 7
Hog Basics: RAF Bentwaters Tactics Guide, 1982 Page 8
Hog Basics: RAF Bentwaters Tactics Guide, 1982 Page 9
Hog Basics: RAF Bentwaters Tactics Guide, 1982
Hog Basics: RAF Bentwaters Tactics Guide, 1982 Page 2
Hog Basics: RAF Bentwaters Tactics Guide, 1982 Page 3
Hog Basics: RAF Bentwaters Tactics Guide, 1982 Page 4
Hog Basics: RAF Bentwaters Tactics Guide, 1982 Page 6
Hog Basics: RAF Bentwaters Tactics Guide, 1982 Page 7
Hog Basics: RAF Bentwaters Tactics Guide, 1982 Page 8
Hog Basics: RAF Bentwaters Tactics Guide, 1982 Page 9