At the bottom of all the various stations is the Task Bar. In common with all platforms, it has access to the various stations, orders menu and damage report. It has the history window, the time and accelerator display, course and speed. Some information displayed here is platform specific such as wind speed and direction to depth below keel. You can also perform course, speed, depth/altitude changes on the task bar.
Controlling where your platform goes is done either via waypoints on the map, a general heading or by clicking on the compass. In addition, the submarine and ship can also control direction by use of the rudder.
Controlling the height and speed of the MH-60R Multi-mission Helicopter and the P3-C Orion can be done via selecting predetermined heights and different speeds. Additionally, in the P3-C you have the ability to control each engine individually. Of course playing with these during normal flight can have some very interesting effects on your plane. (Note: A joystick can be used. See Tom Cofield’s Aircraft Review included later in this review).
Some platforms may contain more or less functionality in a station compared to another platform; however, I will only cover the main function on each station.
F1 will take you to the Bridge on the FFG, the Ship Control station on the submarines, and the Pilot station on the MH-60R and the P-3C Orion.
F2 will take you to the Acoustic station on the FFG, the Sonar Suite station on the submarines, and the ATO station on the MH-60R and the Acoustic station on the P-3C Orion.
F3 will take you to the ASTAC station on the FFG, the Radar station on the submarines, and the Acoustic station on the MH-60R and the Radar station on the P-3C Orion.
F4 will take you to the Hull Sonar station on the FFG, the Radio-ESM station on the submarines, and the Radar station on the MH-60R and the MAD/ESM station on the P-3C Orion.
F5 will take you to the Navigation station on all platforms.
F6 will take you to the Towed Array station on the FFG, the Fire Control Suite station on the submarines, and the MAD/ESM station on the MH-60R and the TACCO station on the P-3C Orion.
F7 will take you to the Electronic Warfare station on the FFG, the TMA station on the submarines, and the Dipping station on the MH-60R and the Infrared Camera station on the P-3C Orion.
F8 will take you to the Weapons Coordinator station on the FFG, the Periscope-Stadimeter station on the submarines.
F9 will take you to the TMA station on the FFG, the Sail Bridge station on the submarines.
F10 will take you to the Weapons Control station on the FFG.
F11 will take you to the Torpedo Control station on the FFG.
F12 will take you to the Machine Gun station on the FFG.
All stations and functions are there for the player to control if you desire to do so. If you find this overpowering or there are just some tasks that are too mundane for you to care to do, you can invoke the Autocrew. The Autocrew for each station or function can be turned on and off at whim. This allows the player to jump in and out of a station as he or she sees fit.
The various stations are laid out in a manner that is uncluttered and easy to use.
Submariners have always rightly believed that they have been hard done by compared to the more illustrious branches of the navy, and this tradition continues in Dangerous Waters. OK, so I might be slightly exaggerating.
All platforms excluding the submarine come with the old-fashioned Mark 1 eyeball. When a submarine is surfaced and you are on the bridge visual contacts seen by the Mark I eyeball will not be registered in the submarine Navigation station.
I also found several irritating factors when using the Periscope-Stadimeter stations. In the Stadimeter station (a subset of the Periscope station F8) to select the reference platform you are first required to select the country and then the platform. The process to select the United States Harpers Ferry will take in total 25 mouse clicks. 16 to arrive at the United States and another 9 to arrive at the Harpers Ferry. Drop down menu’s would have been far more practical.
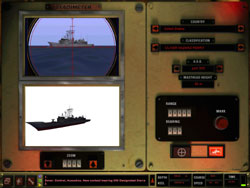 The perspective of the image used in the Stadimeter (as the reference against the image from the photo) is different to that used in game and can make it difficult to gain an accurate AOB (Angle On the Bow).
None of these issues will stop me choosing a submarine; they are however, annoyances that are out of place when compared with the rest of the stations.
I do have one complaint about the implementation of the view system aboard the Oliver Hazard Perry’s Bridge station, the MH-60R Multi-mission Helicopter’s Pilot & ATO station and the P3-C Orion’s Pilot station. At these stations, you are unable to pan your view; instead, you are limited to a narrow field of view either directly in front or to the sides. When in the wings of the Oliver Hazard Perry’s Bridge station you have the ability to pan from the bow to the stern with the view over the bow being at 45 degrees. If you wish to go from the port side to the starboard side it will take 3 clicks going through each of the Bridge stations sub stations.
 The time compression is from 1x, 2x, 4x, 8, and a maximum of 16x. I feel that this battlefield environment does not lend itself to 1024x time compression; however, there were times that I felt that 64x compression could have been useful.
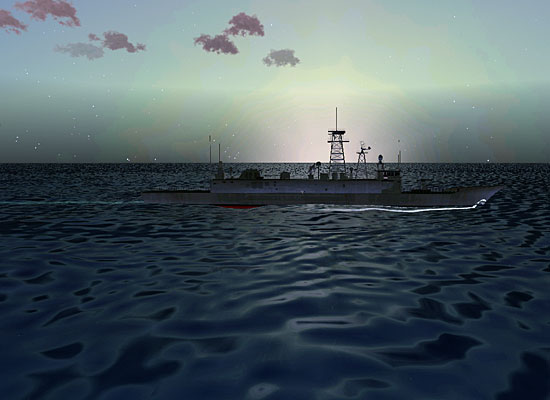
The full-fledge weather system had to be cut. It had been planned that the weather could change over time for the duration of a mission (with subtle states between to lead into each other. The result being that if the mission weather is set to rain, it will rain over the entire 600 nm mile region for the entire mission.
There are no options for toning down the AI. Sonalysts have allowed the player some benefits such as quick reloads and repairs and the ability to be able to ‘show truth’. Fear not, the Autocrew are quite good and the use of them allows the player to grow and expand into the various stations.