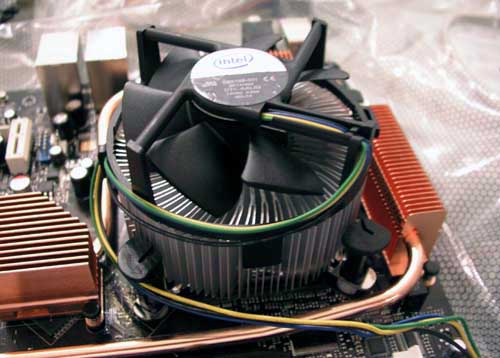
The next step proved to be the most difficult and frustrating. Once the CPU is in place the CPU fan and heat sink have to be mounted on top of it. The mounting system consists of four plastic pegs that you push through pre-drilled holes in the motherboard. I had to attempt the mounting twice when one of the pegs would not push through, and I was surprised at the amount of force that was required to complete the task. Putting so much pressure on the thin motherboard plastic is a little disconcerting, but eventually the final peg pushed through and the job was complete.

Now it was time to put the organs into the body and I found that the ASUS motherboard fit nicely onto the pre-mounted brass case stand-offs. There were three more standoffs to screw in owing to the width of the board, but they lined up precisely with the pre-drilled holes in the case. Once the motherboard was installed I hooked up the power and data cables to the optical and hard drives. I also hooked up the multiple fans to the power cables and also ran the main motherboard power supply into the motherboard. There were also several wires from the case that had to be put onto pins on the motherboard including: front mounted USB and Firewire cables, reset, power and hard-drive activity LED leads. All were well labeled and easy to install; I was surprised at how easily everything fit together and was glad for it.