Falcon4 RP4.1: Viper versus Fulcrum 1 on 1
by Mark “Boxer” Doran and Leon “Badboy” Smith Falcon4, the game, is more than two years old now. For most flight simulation games a title that old would already be gathering dust. However, Falcon4 is among that elite club of “classic” simulations that endures rather longer, thanks mostly to a dedicated fan base and the creativity of those fans […]

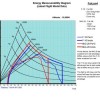
Energy Management: Picking The Right Airplane For The Job Page 2
Go To Page One You will notice that the curves for both Spitfires have been overlaid to the make comparison almost instant. You can see from this overlay that the Spitfire Mk V is the more maneuverable of the two aircraft. You can see by inspecting the diagram, that the Mk V has both […]

Energy Management: Picking The Right Airplane For The Job
by Leon “Badboy” Smith Introduction Pilots who fly Aces High face a formidable challenge…with many different fighters from which to choose, how do they select an aircraft that will best meet their combat needs? Some pilots may choose an aircraft because of its romantic history or combat record, others may choose an aircraft based only on […]
Air To Air Gunnery Revisited – Guns, Gunsights, and Convergence Page 2
Go Back To Page One The Lead Angle and Its Effect On the Gunnery Problem First of all, what’s the lead angle? In simple terms, since the rounds that we fire take some small amount of time to reach the target, whenever we have any deflection at all, we must aim in front of […]

Air To Air Gunnery Revisited – Guns, Gunsights, and Convergence
by Andy Bush Well, it’s been a few months since I covered this subject…and in the time that has passed, I’ve noticed a continued interest in A2A gunnery and gunsights. So much so, in fact, that I’ve decided a return visit might help some to better understand what’s going on when we try to blow the […]

Boom and Zoom Tactics, Part Four: 2v1 Techniques
Feature by Andy Bush Be sure to read all of the parts of this series [ Boom and Zoom, Part One ][ Part Two ][ Part Three ][ Part Four ] Introduction This article is linked directly to the previous series on BnZ tactics. While those articles dealt with the BnZ attack by focusing on your techniques as a single attacker, this final article […]

Boom and Zoom Tactics, Part Two
by Andy Bush Be sure to read all of the parts of this series [ Boom and Zoom, Part One ][ Part Two ][ Part Three ][ Part Four ] In Part Two, we will take a closer look at the HnR attack from initiation to the re-attack (the HnC attack will be discussed in Part Three.). I’ll use screenshots to give you an […]

Boom and Zoom Tactics, Part Three
by Andy Bush Be sure to read all of the parts of this series [ Boom and Zoom, Part One ][ Part Two ][ Part Three ][ Part Four ] I’ll conclude this series with some basic tips on how to fly a Boom and Zoom using “Hit and Climb” (HnC) tactics. Following a discussion of the some academic considerations, we’ll look at two […]

Boom and Zoom Tactics, Part One
by Andy Bush Be sure to read all of the parts of this series [ Boom and Zoom, Part One ][ Part Two ][ Part Three ][ Part Four ] Introduction In the hot and humid morning air, the Sidewinder snaked towards one of two MiG-17s. The pair of F-4Es had run a perfect stern conversion intercept on the bandit flight. Ground […]
Close Air Support in World War II: The Luftwaffe Page 7
Back To Page 6 Acknowledgements Without turning this into an Academy Awards speech, there are some people whom I’d like to thank for their help during the writing of this article……. Andy Bush, for first proposing this CAS series back in October 1999 and for continuing to push me to finish this article. Couldn’t have […]

Close Air Support in World War II: The Luftwaffe Page 6
Back To Page 5 Appendix: The Tools of the Trade: Aircraft and Weapons The Aircraft Although virtually every airframe in the Luftwaffe was used in CAS roles at some point in the war, four models especially “pulled their weight.” Below are some basic statistics for each type. Henschel Hs123 Stats for Hs123a-1: Powerplant: One 880 hp […]

Close Air Support in World War II: The Luftwaffe Page 5
Back To Page 4 Conclusion Anyone studying the role of close air support in the German armed forces of WWII can’t help but walk away in awe at the size and scope of what was attempted. From their fledgling beginning to the stunning victories in Poland and France, to the massive Eastern Front, the […]
