It is abundantly clear in my reviewing the product, and in my personal interactions with Henning, that the Aeroworx team not only has a love of aviation, they also have a personal goal of perfection for their products. It is amusing to see Henning become animated over something that he wanted to model but due to constraints of Microsoft FS2004 he might not be able to do. In describing the hurdles he and his team had to overcome relative the constraints of the underlying product (FS2004) I came to appreciate how innovative and adaptive they had to be to fit a round peg into a square hole.
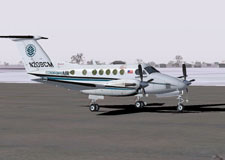
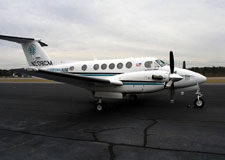
In all the following shots the Aeroworx pictures will appear on the left or above, the actual King Air photographs that I took will appear on the right or below. This is important because time and again I found myself actually confused between reality and the sim! One other important thing to remember is that all of the simulation screen captures have been re-sized to smaller resolution and reduced in quality significantly for bandwidth purposes. The actual in-game screens are even better than these!
The Aeroworx Beechcraft Super King Air B200 and the MedCenter Air Super King Air B200:
 |
 |
 |
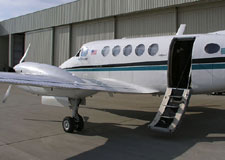 |
At MedCenter Air we actually have three King Airs in the fleet. Two of the aircraft are B200 models (N207CM and N209CM) and one is a plain Super King Air 200 (N210CM). In our fleet N209CM most closely resembles the Aeroworx B200 since both represent later serial numbers equipped with EFIS and upgraded avionics among other things. Though most of the comparative shots are from N209CM I have also used a few photos from N207CM and N210CM since I fly all three and had to take photographic opportunities when the situations were available.
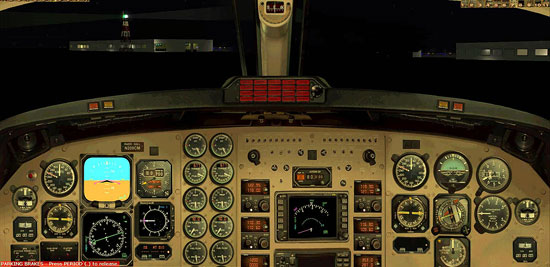
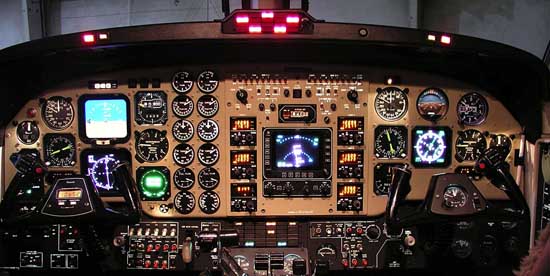
After loading up the Aeroworx B200 for the first time I was plopped down into what I think is the most accurate cockpit representation I’ve ever seen in a simulator. Obviously I have the distinct advantage of having logged thousands of hours in King Air cockpits, so I already felt right at home when confronted with the array of instruments, knobs, gauges and switches.
The 2D cockpit (the Aeroworx picture is actually a composite of the left and right 2D pits put together for comparison to the actual full cockpit photo I took):
 |
 |
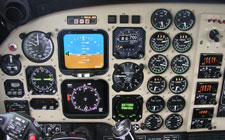
The 2D cockpit is a joy to work with. The resolution is extremely fine with all of the instrument lettering and annunciators clearly readable. The integration of the working gauges within the cockpit is outstanding and I’m amazed at how Aeroworx was able to realistically animate all of the appropriate instruments on the panel. All of the tasks that you would normally be required to do flying a King Air can be accomplished using the 2D cockpit and virtually all of the switches serve a function in normal operations.
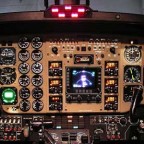
The “heads-down” 2D cockpit view:
 |
 |
All of the sub-panels, side, overhead and other panels can be accessed via a row of 12 clickable icons at the top of the 2D cockpit. Each icon brings up the appropriate sub-panel and after a bit of learning and practice it becomes second nature to find the switches. Again, having experience in the actual aircraft significantly shortened my learning curve so I would encourage you to explore the 2D cockpit with the aid of the included POH.
Related Posts:
Related posts:
 Aeroworx Beechcraft B200 Super King Air: Reality vs. Simulation
 Page 3
Aeroworx Beechcraft B200 Super King Air: Reality vs. Simulation Page 4
Aeroworx Beechcraft B200 Super King Air: Reality vs. Simulation Page 5
Aeroworx Beechcraft B200 Super King Air: Reality vs. Simulation Page 6
Aeroworx Beechcraft B200 Super King Air: Reality vs. Simulation Page 7
Aeroworx Beechcraft B200 Super King Air: Reality vs. Simulation Page 8
Aeroworx Beechcraft B200 Super King Air: Reality vs. Simulation Page 9
Aeroworx Beechcraft B200 Super King Air: Reality vs. Simulation
Aeroworx Beechcraft B200 Super King Air: Reality vs. Simulation Page 3
Aeroworx Beechcraft B200 Super King Air: Reality vs. Simulation Page 4
Aeroworx Beechcraft B200 Super King Air: Reality vs. Simulation Page 5
Aeroworx Beechcraft B200 Super King Air: Reality vs. Simulation Page 6
Aeroworx Beechcraft B200 Super King Air: Reality vs. Simulation Page 7
Aeroworx Beechcraft B200 Super King Air: Reality vs. Simulation Page 8
Aeroworx Beechcraft B200 Super King Air: Reality vs. Simulation Page 9