Introduction
 I’ve been an active flight simulation hobbyist for many years and as well as a software and hardware Beta Tester for CH Products for over a decade. I have used Logitech, Thrustmaster, Saitek (X-65) and CH Products. For purpose of this review I will be using the new Saitek X-55 HOTAS (Hands On Throttle and Stick) system. I currently use the Saitek ProFlight panels, BIP and X-65 throttle quadrant in my simulation hobby, the latter specifically for the split-throttle feature’s utility in games like the DCS A-10 (A and C) and the DCS Series in general not to mention FSX and any other flight simulation that may support a multi axis throttle of this type on my hard drive.

The new Saitek X-55 H.O.T.A.S.
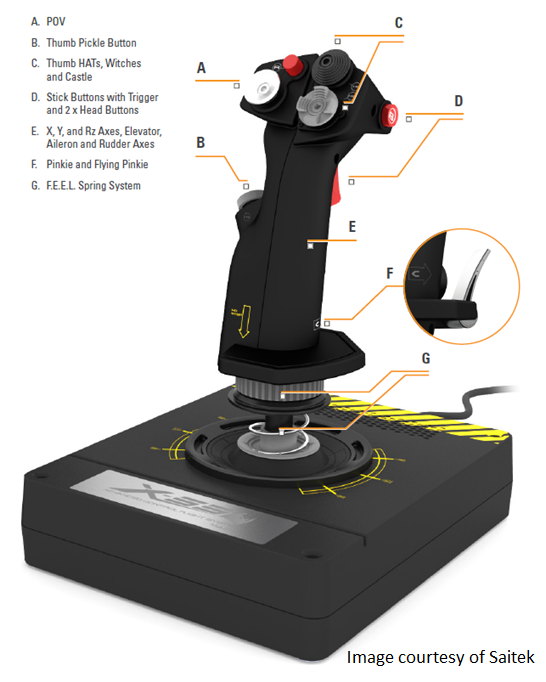
The Stick
If you are looking for something that isn’t going to take up a lot of real estate on your desk, well, consider that the dimensions for the X-55 are: Length 9” Width 7 ¼ “ Height (to the top of the stick) 10”.
The Stick is comprised of the following components:
Saitek has gone back to their roots (for the most part) using a single spring to provide centering tension for the stick. However, what may F.E.E.L. right to some, may not F.E.E.L. (see what I did there) right to others as it pertains to the stiffness of the stick. Saitek has come up with the ability to increase, or decrease the sticks stiffness using one of four springs (included) or no spring at all. With this system there is more of a tactile F.E.E.L. of your stick placement on either the X or Y axis unlike the X-65. With the X-65 stick, I just wasn’t F.E.E.L.ing the Force thankfully the USB connecter is on the Throttle Quadrant making it useable in my HOTAS configuration (FighterStick, X-65 Throttle Quadrant).

To remove/replace the spring let’s observe this video brought to us by Saitek:
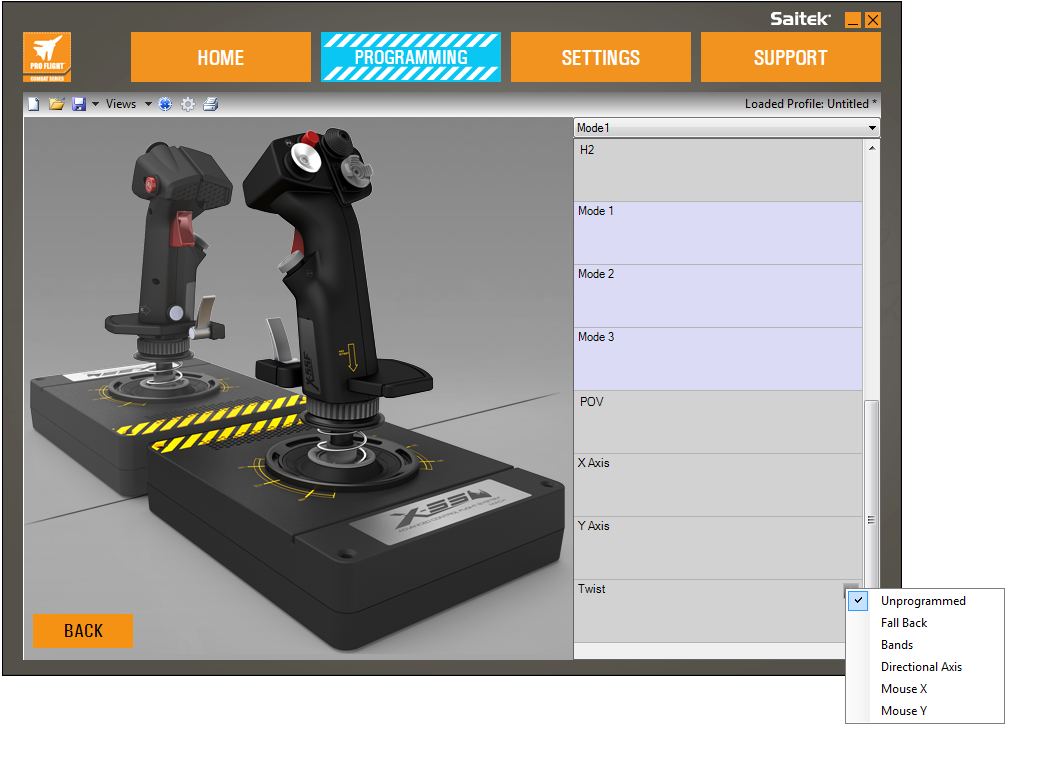
The stick has the typical X and Y as well as the twist (Rudder) axis. If you have a set of rudder pedals the twist can be disabled in the programming software as seen here:
Before plugging in the X-55 stick and throttle quadrant, drivers and the new H.U.D. software need to be installed. You can get both here. Once the drivers are installed you can then plug the stick and throttle into their own USB port.
Once plugged in, let Windows recognize and install the controllers. The controllers are USB 3.0 and 2.0 compatible. After the controllers are recognized and installed, it’s a good idea at this point, (as with any controller system) to calibrate them.
For now, Saitek has chosen to use the Windows Calibration “Wizard”. There is no calibration process in the new H.U.D. software, yet. This will change in an upcoming re-release of the H.U.D. software. If you have attempted to calibrate a multi axis throttle quadrant of any manufacturer in the Windows Calibration “Wizard” you know that isn’t as easy or intuitive as it seems.
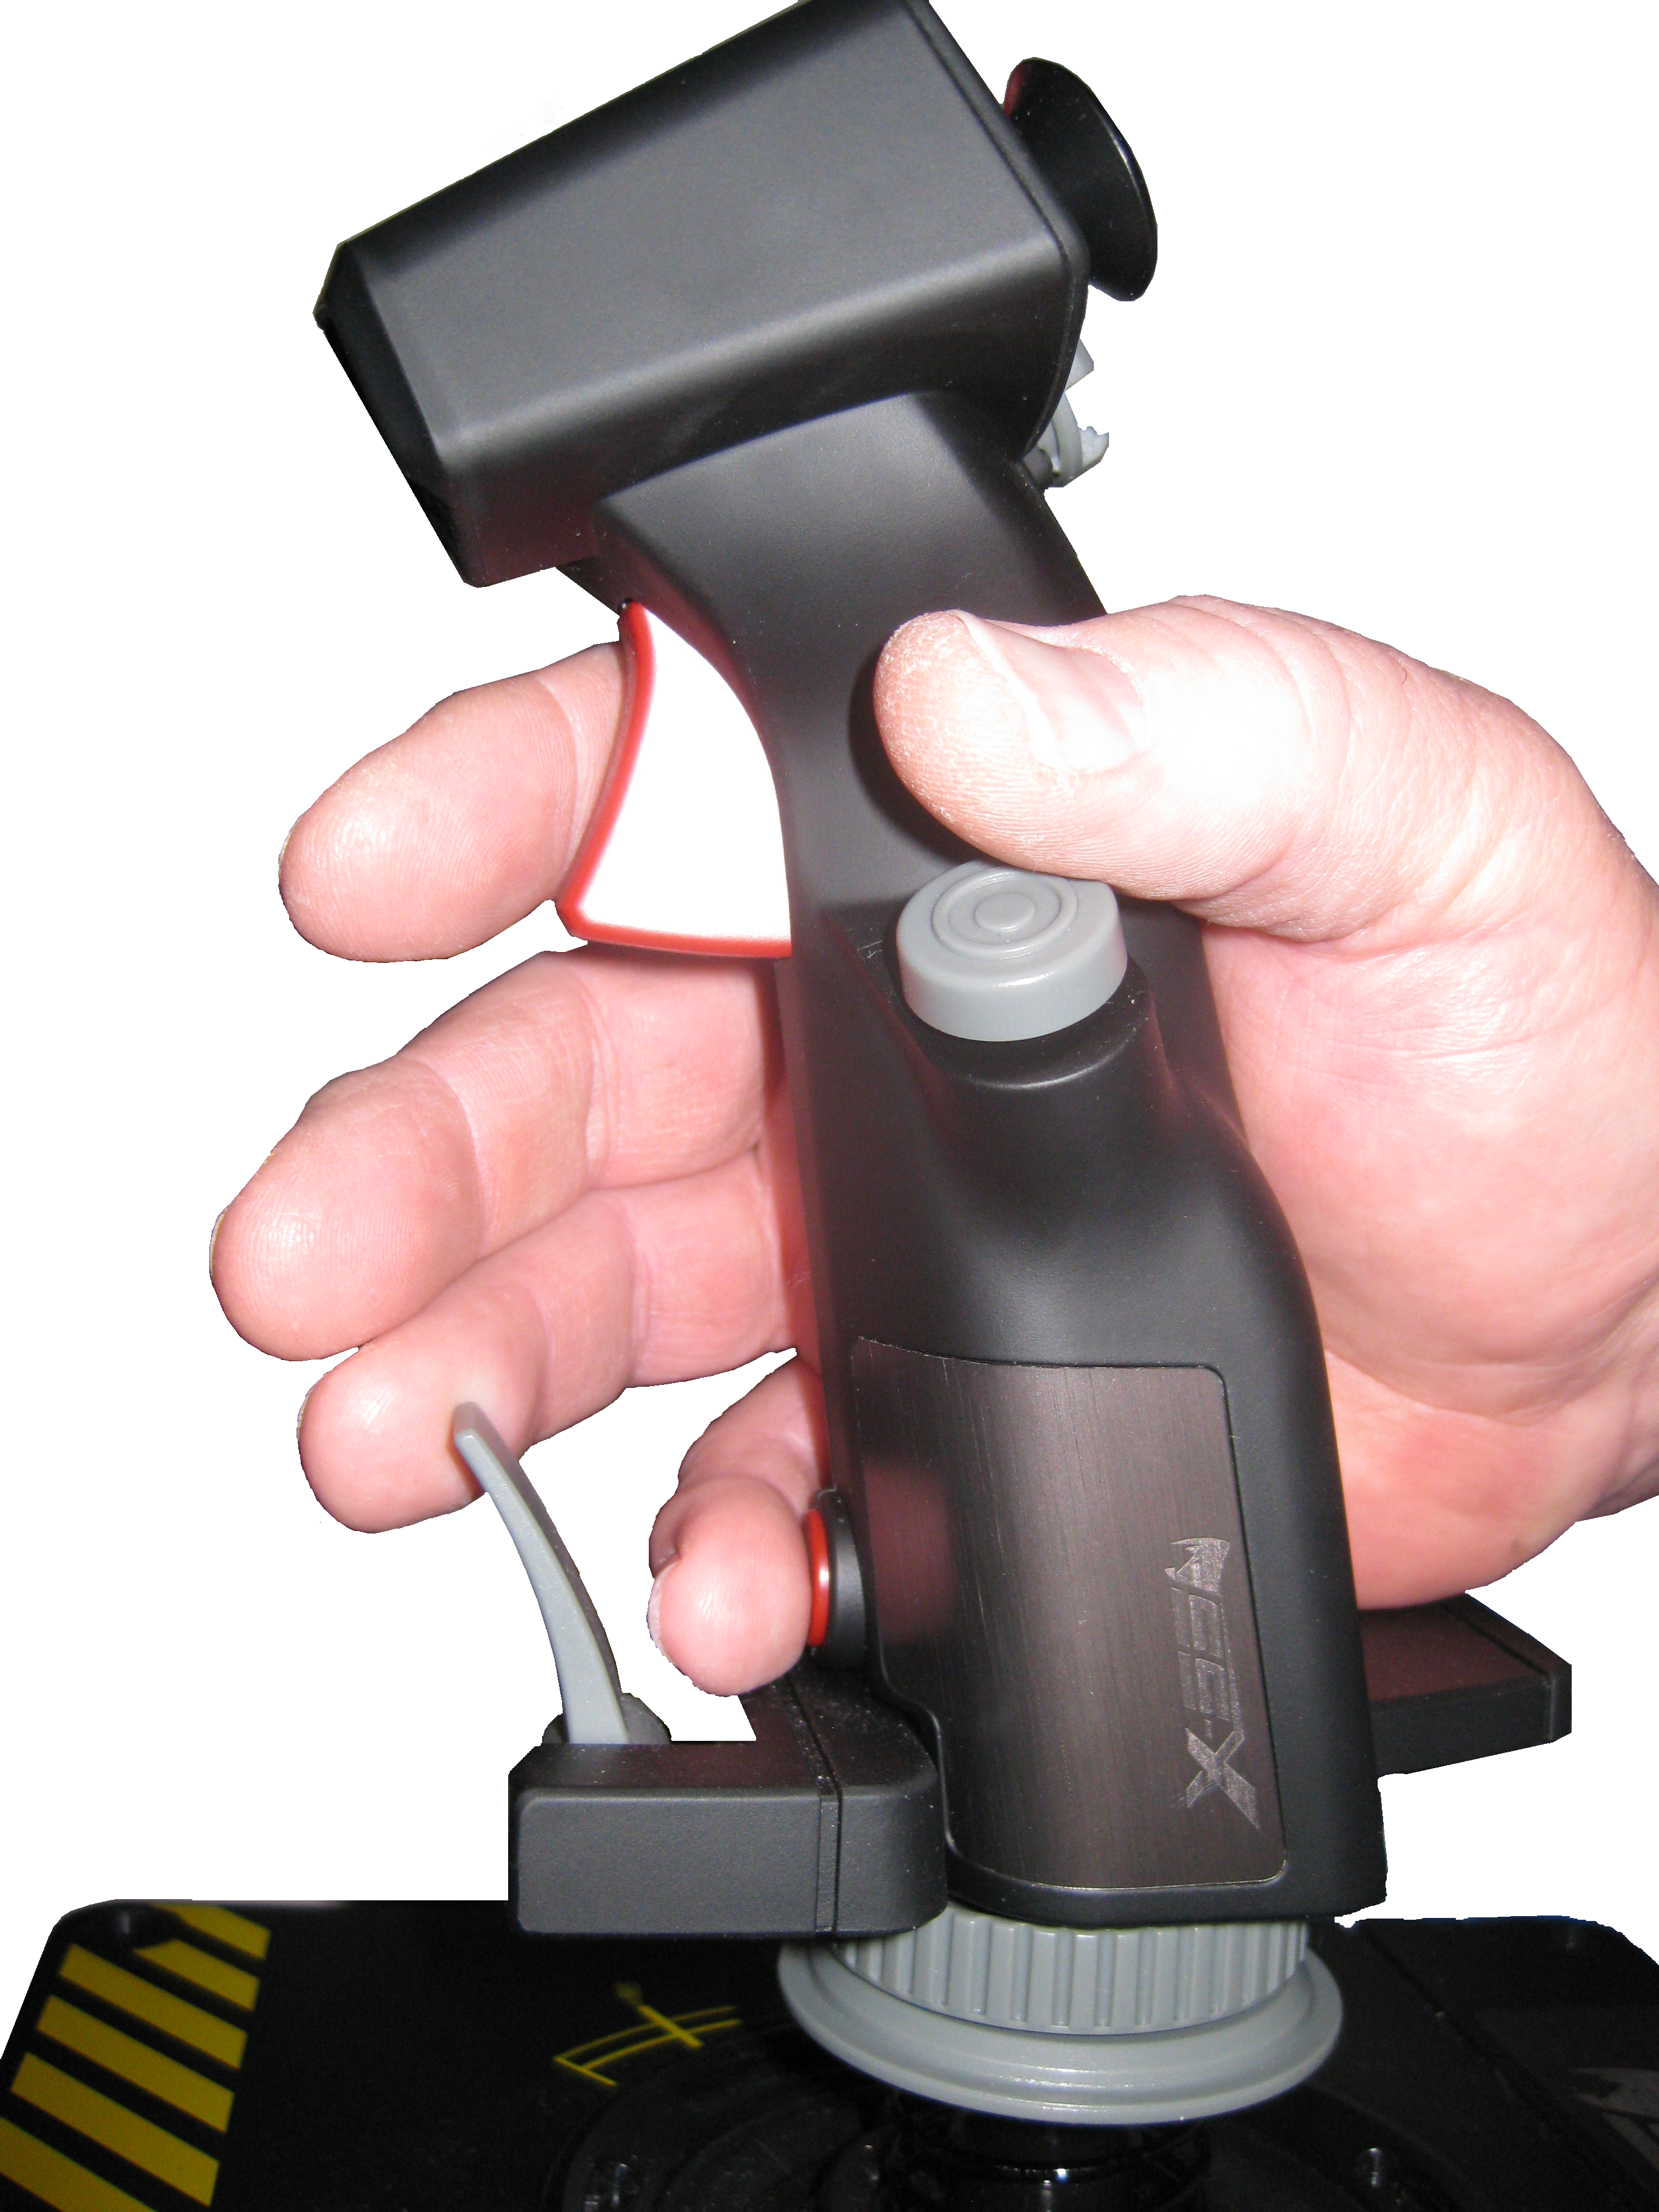
The Stick and its base are made of plastic much like if not the same as the X-52 series HOTAS. The stick itself however, is coated with rubber much like the Logitech G940. In my opinion, this has nice feel to it and doesn’t leave you cold to the touch like the X-65 does. Each HAT and button is easily accessible. That said, I found that in order not to inadvertently hit either the POV or castle HAT while pressing the pickle (for me) button I have to somewhat arch my thumb over the POV and castle HAT.

I found the red spring to be closest to what I’m used to in terms of stiffness. You X-65 or Cougar kind o’ guys/gals may consider the green spring to begin with and work your way down (if you choose). The tactile feel of each HAT and button is at first strange (for me). The throw of each direction of the HAT is quite a bit longer than what I’m used to. Each HAT is an eight way HAT that can also be programmed as a four way HAT. However, there are eight physical positions of each HAT. The trigger (single stage) too has quite a bit further to pull before (in my opinion, and used to) an action is performed (guns, rockets…). Yes, the stick is indeed a twist grip. There is no hardware (mechanical) stop to keep it from twisting. However, the amount of torque needed to twist the stick is (I F.E.E.L.) significant enough to keep it centered while manipulating the X or the Y axis without providing any input to the twist (rudder). The amount of torque required to twist the stick from center is 375g.
My hand rests comfortably on the stick.

Throttle Quadrant
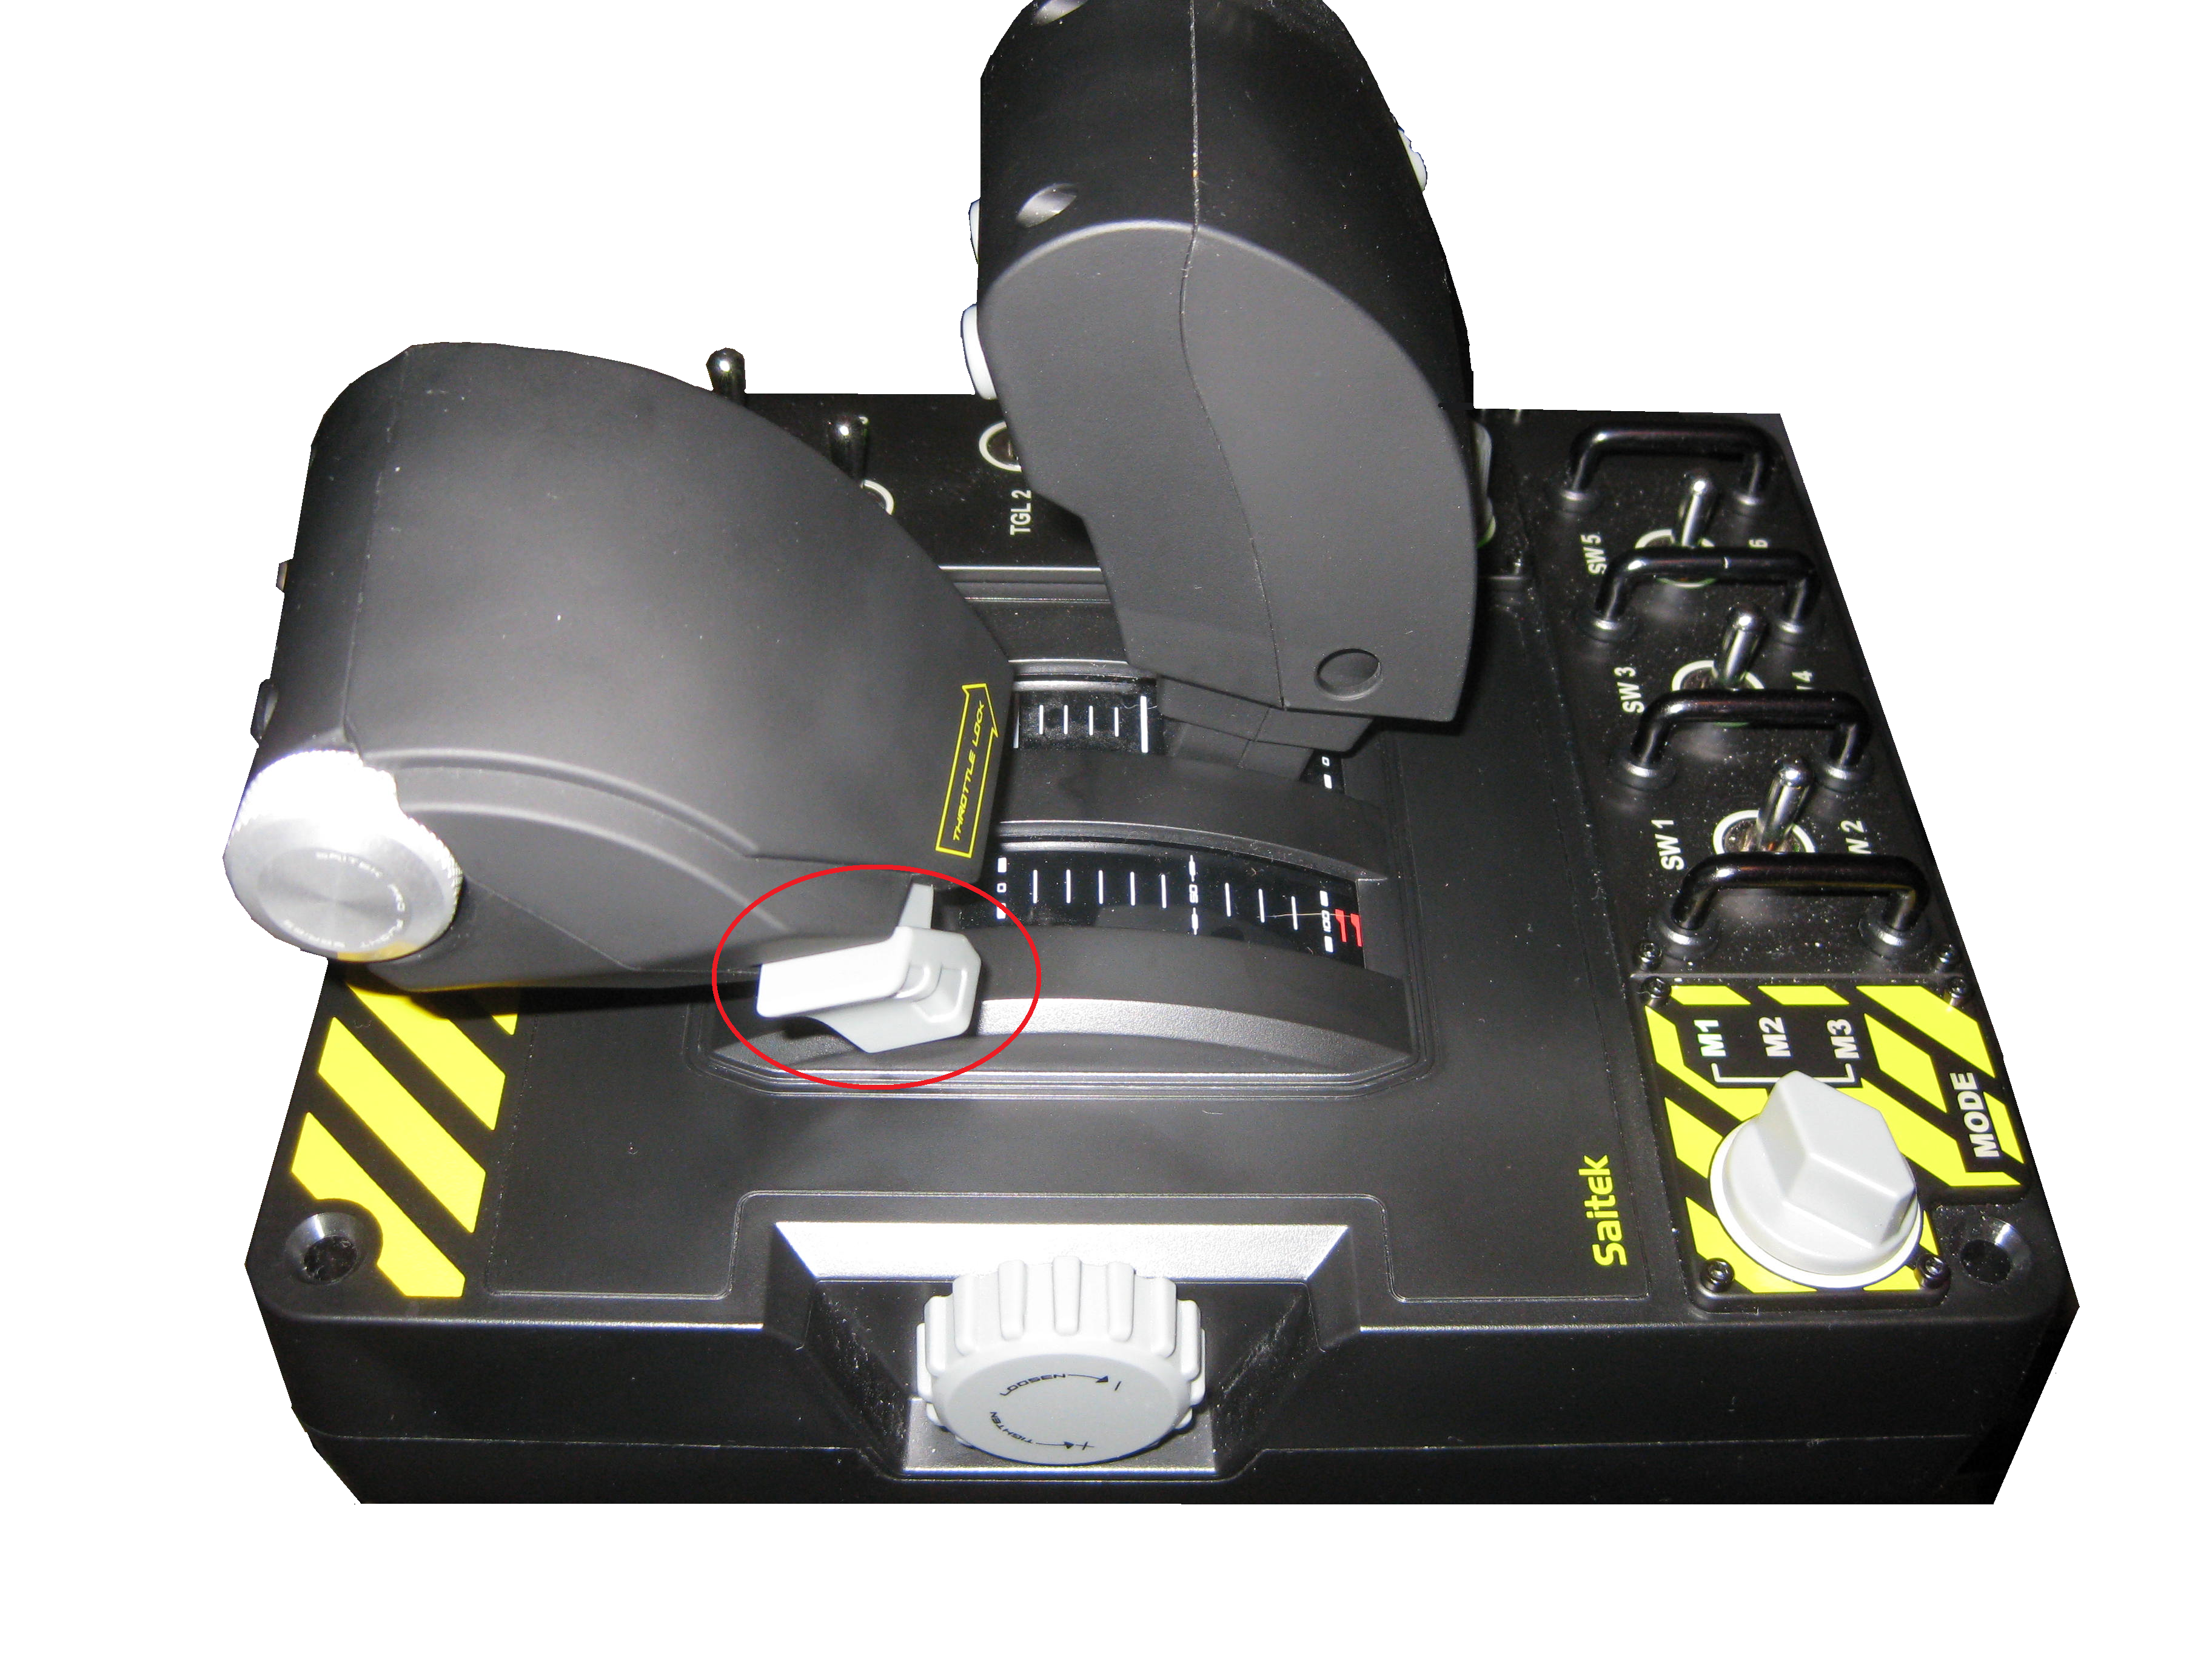
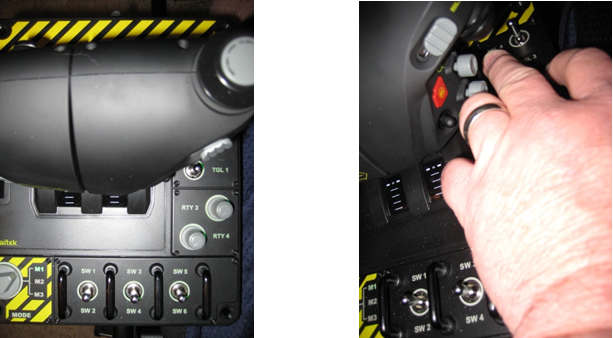
The Throttle Quadrant and its base are also made of plastic much like if not the same as the X-52 series. The handles of the Throttle Quadrant are also rubber coated much like the Logitech G940. And again, has nice feel to it and doesn’t leave you cold to the touch like the X-65 does. Each HAT, button, slider and rotary on the handles are for the most part easy to get to and manipulate. Again the HATs have a much longer throw to each position than what I’m used to. Both rotaries on the number two throttle have a center detent. There are no detents (AB or idle) on the throttle handles themselves. The throttle tension adjustment is now a lot easier to get to. Rather than the throttle friction adjustment being on the bottom of the throttle quadrant it is now located on the left side of the base of the throttle quadrant.

If adjusted to its minimum resistance, you could conceivably get away with not mounting the throttle to whatever surface you place it onto. This would take a fine touch in your throttle manipulation skills however. Minimal increase in friction, I recommend mounting the base to your cockpit, desk… I used industrial strength Velcro. There are however, four pre made screw holes (one in each corner).
The switches and mode switch aft of the throttle handles are easy to get to and use. The toggles to the right however, I found I had to be somewhat of a contortionist to manipulate them depending on the position of the number two throttle. You would probably not want to program them to anything needed in any Air Combat Maneuvers (ACM).
Each of the throttle handles can operate independently of each other. Or, they can be locked together by latching or unlatching the left to the right throttle as seen here…