|
#2492270 - 04/11/08 12:33 PM
 Re: Simpit ideas
[Re: Mr_Blastman]
Re: Simpit ideas
[Re: Mr_Blastman]
|
Joined: Dec 2000
Posts: 938
DawgMan

Member
|
Member
Joined: Dec 2000
Posts: 938
Kentucky
|
Wow! Very impressive. Can I come over and play?
Gear: Asus P4P800 3.2ghz, 1gb ram, SB Audigy 2 ZS, ATI 9800 pro, Cougar #04607 and TM Elite Rudders
|
|
|
#2492310 - 04/11/08 01:43 PM
Re: Simpit ideas
[Re: DawgMan]
|
Joined: Nov 2005
Posts: 557
GrizzlyT
Member
|
Member
Joined: Nov 2005
Posts: 557
Sterling Heights, Michigan
|
...what fresnel were you using in your prior post? It was a Lumenlab 650mm Pro, found in their DIY/Optics section here . Although, be aware that it is not cut for a 4:3 aspect ratio (it's more square), so you will need to carefully cut it down to size yourself. Can I come over and play? Sure, just no sleep-overs! (That's a little too Neverland Ranch, for me.  )
|
|
|
#2517965 - 05/20/08 06:35 PM
Re: Simpit ideas
[Re: Corsair8X]
|
Joined: Nov 2005
Posts: 557
GrizzlyT
Member
|
Member
Joined: Nov 2005
Posts: 557
Sterling Heights, Michigan
|
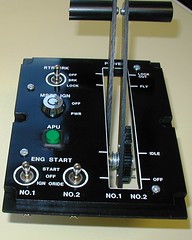
A minor update.... My original throttle quad had a continuous label, for the markings on the side plates. I never really liked it much. It worked... but it looked a little too cheesy.  So, I decided to make some metal replacements. I cut down some thin galv sheet metal, rolled it and formed on a scrap piece of MDF, painted it black, and used smaller labels for the markings. I also drilled for some small rivets, to help hold it on and define the zones.  I"m much happier, with this result! 
|
|
|
#2517966 - 05/20/08 06:36 PM
Re: Simpit ideas
[Re: GrizzlyT]
|
Joined: Nov 2005
Posts: 557
GrizzlyT
Member
|
Member
Joined: Nov 2005
Posts: 557
Sterling Heights, Michigan
|
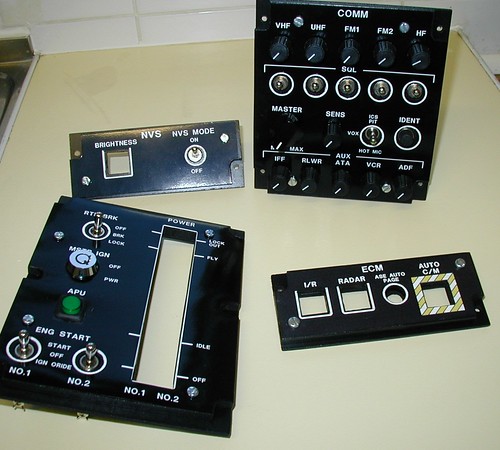
A bigger update.... I just finished the MISC panel, too. (If you look at earlier pics, it's the big gray block, on the left side.) All the functions of the software have already been assigned to existing panels. All that was left was to bring power into the pit. I needed a panel to control the new ventilation system, the cockpit's interior lights, and bring AC in for the MFDs and the indicator's power supplies. note: I used banana jacks and plugs, for the connections this time. One, because I felt more comfortable with a heavier connector for 110vac. Two, because I had a bunch of new ones laying around already.  FRONT VIEW FRONT VIEW SIDE VIEW SIDE VIEW BACK VIEW BACK VIEW INSTALLED INSTALLED That's all for now. 
|
|
|
#2528962 - 06/08/08 07:00 PM
Re: Simpit ideas
[Re: GlynD]
|
Joined: Nov 2005
Posts: 557
GrizzlyT
Member
|
Member
Joined: Nov 2005
Posts: 557
Sterling Heights, Michigan
|
Grizz
A couple (or three) questions if you can spare the time please... Always! 1) What are the panels made from, are they machined and how much do they cost? The top plates are 3/8" MDF, the back plates are .094" FR-4 (double clad), and the rear I/O plates are made of aluminum sheet metal. I really can't say how much they cost, per panel, because I bought everything in bulk some time ago. The MDF I bought in a full 4' x 8' sheet and the FR-4 in 2' x 2' sheets. You may have to special order the MDF (as I did) because local lumber dealers usually only carry 1/4" and 1/2" in stock. The FR-4 I found on ebay. The sheet metal scraps I just have laying around, from other projects, but I would bet I ordered it from McMaster-Carr originally. (As I do most of my raw materials.) The reason all my panels use FR-4, is because I started making my panels, with the MFDs first. I used surface-mounted tact switches and soldered them directly to the backplates, which were custom etched circuit boards that I made. So, for consistency I kept using it....even though all the other panels have all the copper etched off. As for machining... The backplates were hand cut using a band saw. The drilling of both top and bottom plates were mostly done on a small drill press. (Although, all of them could have been hand drilled.) The top plates were cut out using an automated router that I have at work. It just so happened we picked it up, at the same time I started working on the panels. I needed to learn how to program it and what better way, right?!?! Although, they too could have been cut out by more "manual" means. After sanding, everything got two coats of primer and about 4 coats of flat black. 2) What do you use for labelling them? Well, my method is not the best and would probably be frowned on by master builders (like Gene Buckle) who have laser etchers at their disposal and go for the whole back-lighting thing. I use a P-Touch labeler, with white-on-black label cartridges. (Just choose the font size, type it in, and hit the print button!) Then, I cut away the excess label with an X-acto knife and stick them on. They are probably not going to be the longest lasting, or the most realistic solution but they are alot easier. And since they are vinyl they do last longer than labels you would do on a regular printer. Besides, if a label ever gets messed up I'll just make another one. (They're also alot easier to deal with, if you ever change your mind.) The white lines that seperate the sub-systems is 1/4" automotive pin stripping. (Available at most auto parts stores.) 3) What do you use to control the throttle - as in EECH it is advanced by the < and > keys. 4 presses for power up and 5 presses with the CTRL key to power down? I use a Hagstrom KEAD6 to control it. It's designed to turn pot signals into key strokes. (Perfect for EECH which has the throttles mapped to keys, instead of axes.) The configuration software also allows for setting up multiple zones and outputting different keys in different directions. Each of my throttle arms is connected to a double pole (stereo) slide pot. Then, all 4 outputs (left up, left down, right up, and right down) are connected to 4 of the 6 inputs, on the KEAD6. I hope that helps!
|
|
|
#2529024 - 06/08/08 09:57 PM
Re: Simpit ideas
[Re: GrizzlyT]
|
Joined: Feb 2007
Posts: 410
GlynD
Member
|
Member
Joined: Feb 2007
Posts: 410
Shropshire UK
|
That does help thanks.  I have Leo's BU0386 which I have finally finished wiring up (apart from the blocking diodes).  and 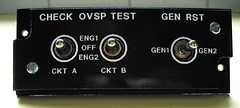 (More pics on my Sim pit Flickr page ) That has the ability to add up to 8 pot controls as well. I will have to have a look see if there is any software (i.e. Joy2Key etc) that can allocate zones in the same way the KEAD6 does... Cheers
|
|
|
#2529036 - 06/08/08 10:32 PM
Re: Simpit ideas
[Re: GrizzlyT]
|
Joined: Feb 2007
Posts: 410
GlynD
Member
|
Member
Joined: Feb 2007
Posts: 410
Shropshire UK
|
I am going to give GlovePIE and AutoHotkey a go to see if they do the trick for the throttle zones... I hope AutoHotkey does the trick, as I will possibly be using this to do the BU0386 joystick button > keyboard mapping! Cheers
|
|
|
#2534007 - 06/17/08 12:40 AM
Re: Simpit ideas
[Re: GrizzlyT]
|
Joined: Jan 2002
Posts: 5,618
The Nephilim
S3D GuRu
|
S3D GuRu
Hotshot

Joined: Jan 2002
Posts: 5,618
3rd Stone from the Sun !!
|
Wow Some Very Impressive Work and Dedication to Building these Pits. I have Built for me the Best Solution for Now I Built a Virtual Pit I couldn't go with just 1 pit as I fly several Sims w/EECH being the Latest. I will post Some Pics and a Vid I made with TAW. I also Made a Vid With FRAPS and EE2 But you cant see the Screen as it is Decent sized one. I am Already of thinking of going Bigger but for now it will do. I also Bought a Marantz 4001 Reciever I use as a Pre/Pro and Creatives AV Cable Hookup from my Sound card to the Pre/Outs. I als Bought 4 SHS Audio 100Watt Powered Speakers. (IF I had to do it again I would of just got the Passive Speakers) But these work OK just a lil bit of Amp Hum when things are quiet and it is turned up loud. I also Built a new Computer with some Older but new Parts except the CPU that was used. Sys SPecs: Intel PIV 3.8GHZ HT CPU Asus P5n32-E SLI Mobo Audigy 2 ZS from old sys used but working Flawlessly BFG GeForce 7950GT OC 256mb Vid Card 94.24 Drivers OCZ 2GB Memory SLI Ready Antec TruePower 550watt SLI Ready I was going to go SLI but Still NOT sure if it will work in 3D Stereo with the 7950 GT Vid Card?? I know it works with the 6800 but NOT sure About the 7950?? Anyone know for sure?? I got inspired for this Years ago and Always wanted to get a BIG Screen. Well I had seen a link to this website http://www.3dflightsim.com/ I just had to get One. Well After Alot of Searches and Reading I bought a Sharp XR10XL Projector and Built a 45" 4:3 Screen. I also game in 3D with Edimensionals 3D Glasses, Heck I even built a Retro Computer for this Project to be 3D Compatible. I see that DickDasturdly Also Games in 3D with a Projector Cool I thought I was the Only one well we are Few in Numbers but 3d Gaming is the #%&*$#. EECH in 3D with the Big Screen Sometimes I feel like I am In a Real Military Sim ulator it is Very Immersive Especially with the Speakers I bought. Well without Further ado here are Some Pics and the Vid. I still need to get the Screen and Projector Mounted and I since Fixed the Screen geometry. 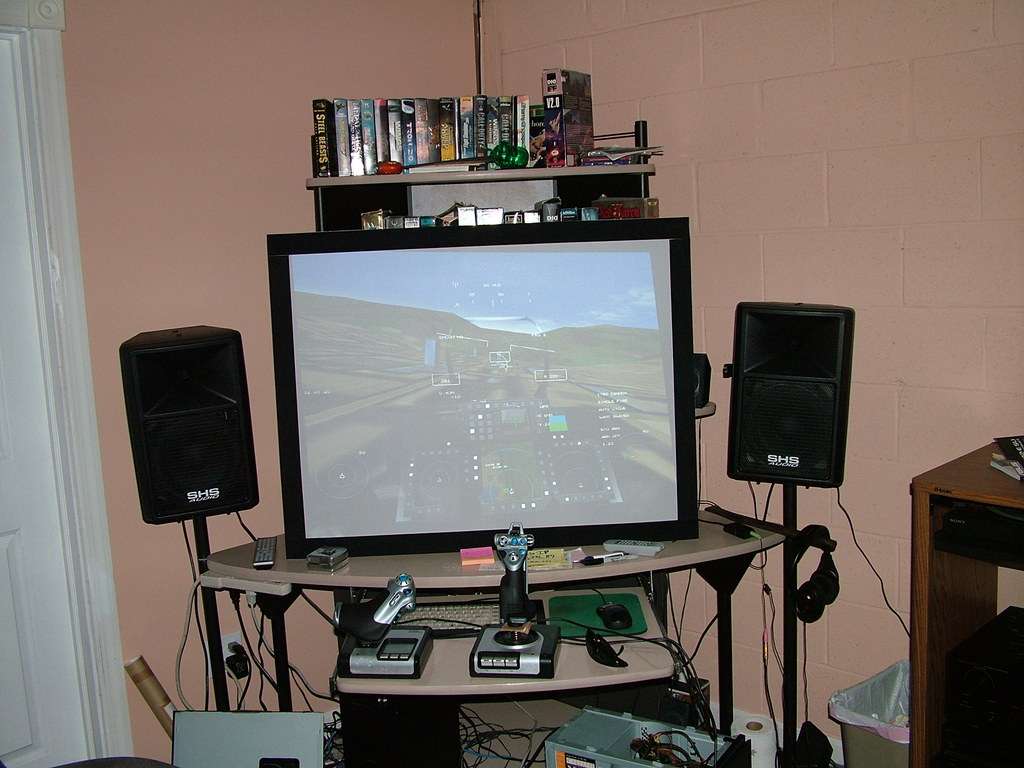 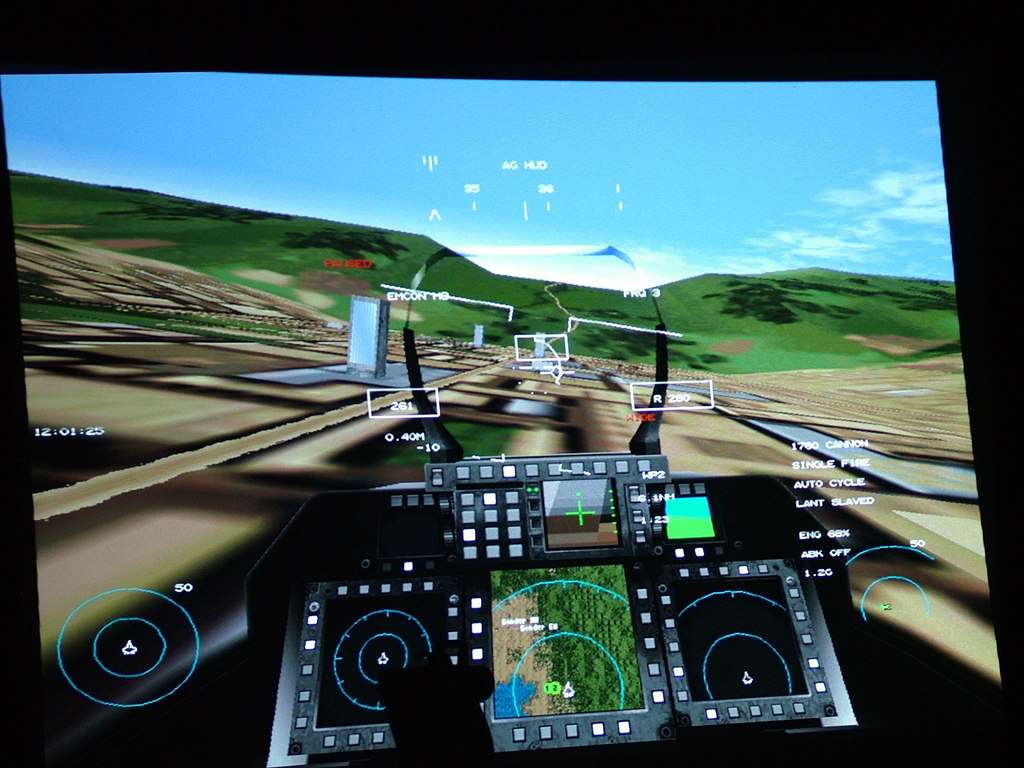 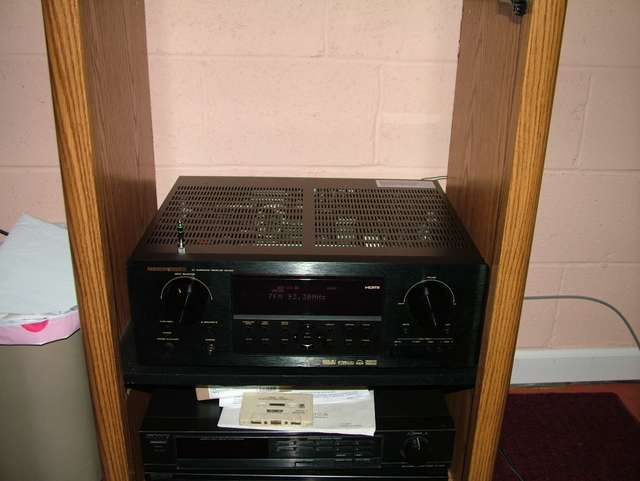 Here is the Vid of TAW a F22 Sim from DiD: http://www.youtube.com/watch?v=ubVIwGGx0ioEDIT: I can make a EECH/EE2 Vid in Anaglyph if anyone is interested?? or just a regular Vid of EECH in Action??
Last edited by The Nephilim; 06/21/08 03:37 AM.
Intel i7 11700K @ 5.0GHZ / ASRock Z590 Phantom Gaming 4AC Motherboard / EVGA 2080Ti / SoundBlaster Z / Windows 10 64bit / Reverb G2 VR Gear. / Thrustmaster Cougar / Buttkicker Simulation /
|
|
|
#2550708 - 07/14/08 11:04 PM
Re: Simpit ideas
[Re: GlynD]
|
Joined: Feb 2007
Posts: 410
GlynD
Member
|
Member
Joined: Feb 2007
Posts: 410
Shropshire UK
|
Update to the pit pics... 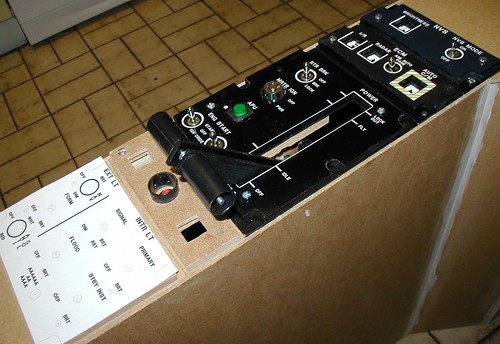 Flickr Simpit pics Flickr Simpit pics When the Lighting and Jettison panels are finished that will just leave the DEK (Data Entry Keyboard) to be built. Not sure how I'm going to do that one - might just end up using a nano keyboard from Maplin's... MFDs are still giving me grief though - had 2 quotes �400 and �250 ($800 and $500)! Bit out of my price range! Cheers
|
|
|
#2583767 - 09/09/08 10:21 AM
Re: Simpit ideas
[Re: GlynD]
|
Joined: Nov 2005
Posts: 557
GrizzlyT
Member
|
Member
Joined: Nov 2005
Posts: 557
Sterling Heights, Michigan
|
 Time for a small update.... I finished mounting the right side panel and in doing so, I altered the build again. (An eventuality, when you design as you go.  ) I've been wrestling with how to simplify entering and exiting the pit. If I were to stay true to the Comanche, I would have to climb through the left side window. There are a few issues with that. - First, most of my custom built panels are on the left side and the thought of climbing over them every time was not comforting. - Second, the space that my pit occupies is better suited for a right side entry. - Lastly, after one knee surgery (and one on the way!), the idea of climbing sent me running for the Naproxen! So, I decided to hinge the right side panel. (Eventually, the exterior shell will also be hinged but seperately so that when someone besides me is flying I can still help them fly.) Here's what I came up with.  Here it is closed. It doesn't have the outer skin on yet, so you can see the cable latch.  Here is a close-up of the hinge. The hinge is stock aluminum piano hinge but to give it a smoother travel I disassembled it, filed down the interlacing section a bit, and installed delrin washers. I also put in a ring, at the top of the pin, for future disassembly. The threaded rod arms, behind and inboard of the hinge, not only help to stabilize the panel but allow me to tilt and level it.  Here is a close-up of the cable latch assy. The rubber bumper helps to cushion the blow, when closing it, and allows me to adjust out any slop, in the pin latch. 
|
|
|
|


 and
and