A few things I noticed during my exploration in the menus:
Game Settings / Options
Two big items to look for under gameplay settings are the SIMULATION preset button (don’t you dare touch the GAME preset button! 😉 ) and the “Easy Communication” option. I’ll go into more depth on the the Game mode and the communications in following sections, but the rest of the settings are similar to those in DCS: Black Shark.
Controller Setup
Setting up controls was a breeze, although I did my homework in advance and created a map laying out where I wanted critical buttons and functions on my HOTAS (Saitek X52 Pro) before even purchasing the game (check the SimHQ DCS: A-10C Warthog Forum here for HOTAS profile tips and lessons learned). Don’t forget that your axes controls (pitch, yaw, roll) are in the “Axis Commands” category and are NOT in the “All” category. The number of available commands is impressive, but even more impressive is the number that you actually have to map. Firing a Maverick involves a lot more than two button presses in the real Hog and DCS: A-10C Warthog simulates every step.
If you don’t have the Data Management Switch, Target Management Switch, Coolie Hat, Boat Switch, China Hat, and Slew Hat bound somewhere, you’ll find yourself looking down at the keyboard at critical moments.
 |
 |
|---|
If your current joystick simply doesn’t have the button-real-estate to map these critical features, be sure to memorize the keyboard locations or even remap them to better fit your control style.
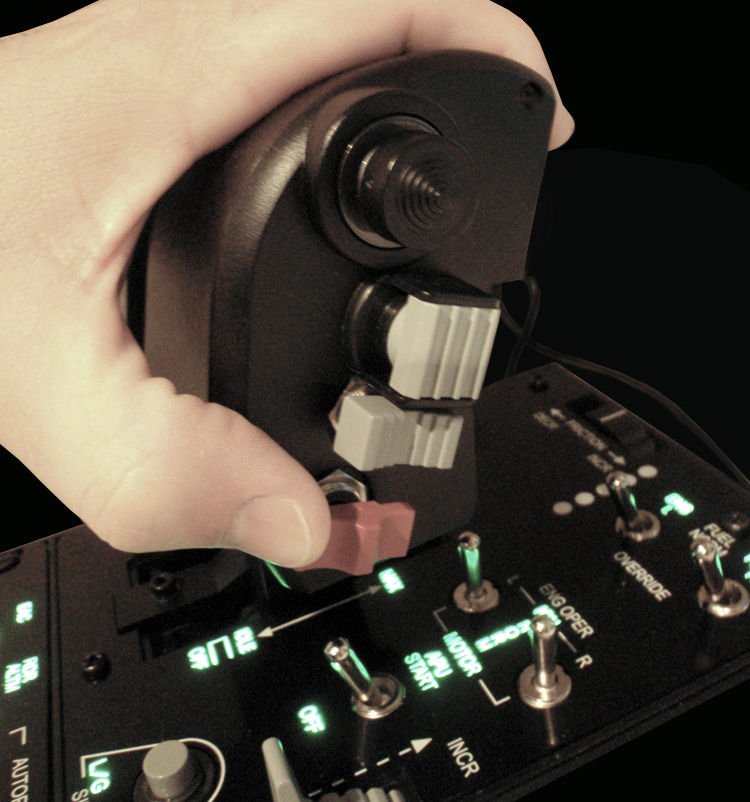
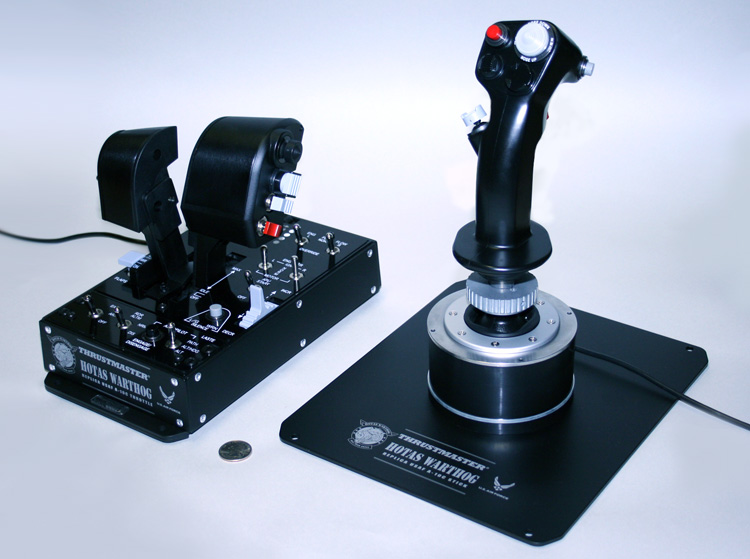
Of course, with the Thrustmaster Warthog HOTAS you’re guaranteed to have all the right controls at your fingertips, because the Warthog HOTAS faithfully recreates the DCS: A-10C Warthog control inputs, down to the amount of finger pressure needed to activate a button! As yet another bonus, Warthog HOTAS users will find integration into DCS: A-10C Warthog literally plug and play. Many users remap the POV hat to the trim switch instead of views and tweak the sensitivity on the slew control, and are then off and flying with every control working as advertised. This author is intensely jealous.
Setup completed, now it’s time to fly!
DCS: A-10C Warthog offers a few different ways to get your Hog fix: Game Mode, Training, Single Player Missions, Campaign, and Multiplayer. Let’s take a look at each of them.
Game Mode
I’m more of a button-and-switch kind of pilot, but, for the purposes of posterity*, I tested the game mode of DCS: A-10C Warthog. Game mode enables pilots who don’t have time to spend on a learning curve, or who don’t want to spend time on that learning curve, to experience the thrill of close-support combat in the A-10C Thunderbolt II and all that implies. Even advanced pilots can enjoy an arcade approach to tank busting without all the switchology to get in the way from time to time. Like DCS: Black Shark, game mode in DCS: A-10C Warthog includes a simplified flight model, single-button weapons control systems, a god’s eye “radar”, and colorful onscreen symbols to help keep the pilot aware of where they are and where the bad guys are.
* that old phart guod made me test it. 🙁

DCS: A-10C Warthog – Game Mode
I was quite surprised to find a complete lack of information on game mode in any of the documentation that was included in the download package. While folks who play game mode aren’t looking for 700-page manuals to flip through, the quick start manual doesn’t even reference the mode. There is no key list, procedure, or even a paragraph on “here’s what you need to do to kill stuff” in any document I could find. While an inquisitive player could browse through the control settings to find the default key bindings for essential commands, this omission is quite glaring, especially considering that this mode was specifically geared for the casual gamer. Despair not, causal gamer, there are plenty of helpful folks on the SimHQ Forums to help student pilots through the first hoops, just browse through here.
Missing documentation or no, the game mode is quite simple. Click the “GAME” preset button in the Game Settings tab of your options window then go load up an Easy or Medium Instant Action mission.
Want to fire a Maverick at a target in Game Mode?
- Press D to cycle through available weapons to the Maverick.
- Press M to cycle through targets until your desired target is selected.
- Press left alt + space (or joystick button #2) to launch the missile.
- Wait for the big gooey explosion.
Want to fire a Maverick at a target in Simulation Mode?
- Make the HUD the Sensor of Interest (SOI ) by tapping the coolie hat up once.
- Press the Master Mode Control Button until CCIP mode is set.
- Tap the DMS left or right to call up the Maverick weapon profile.
- Tap coolie right until the Maverick screen is displayed on the right MFCD.
(Alternatively, press the OSB button labeled “MAV”) - Press and hold coolie right to make the Maverick screen SOI.
(Alternatively, press the “MAV” OSB button a second time) - Use the slew control on the throttle to point the Maverick screen at the target.
- No lock? Keep trying. Stabilize the Maverick sensor with respect to the ground by tapping the TMS key aft.
- Once the target is locked (indicated by a flashing cross on the Maverick display), press and hold the weapons release button for at least 2 seconds to launch the missile.
- Wait for the big gooey explosion.
Once you’ve wet your whistle with the Game Mode, head over to the Training section to learn how to ride the real Hog with the training wheels taken-off.