General Assembly
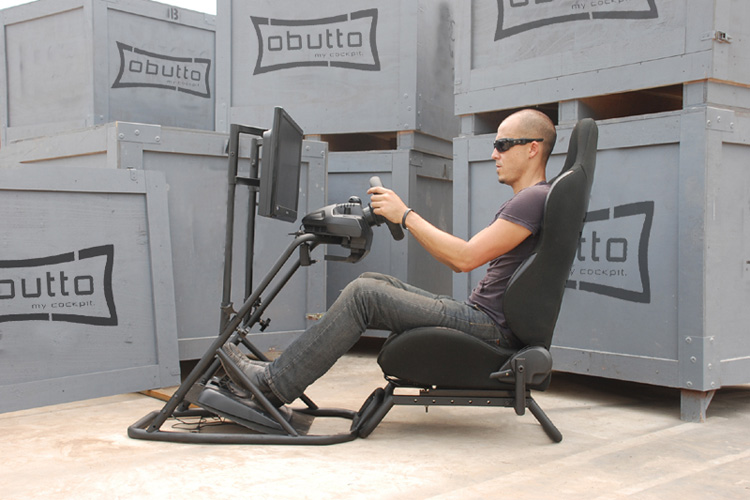
The Gaming Cockpit can be assembled very quickly, but you will miss one of its best features if you take that approach. There is a near infinite number of configurations in the way it can be setup, and you need to spend time thinking through what will work best for you. If you’re into multiple genres of simulations, you need to think through exactly what you like and what feels most comfortable when you’re playing. Many of the cockpits I looked at have a single configuration. They may have some adjustments to the settings for the seat or the controls, but don’t plan to reposition them.
To get an idea of the dimension of the Obutto oZone Gaming Cockpit, look at this diagram from the Obutto web site.
 |
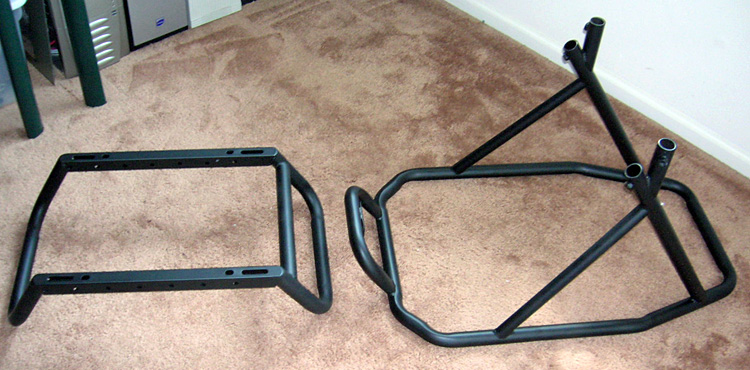
First let’s look at the front and back frame units. Originally Obutto offered the Gaming Cockpit with a single frame configuration, but the increased size of the packaging required an increased shipping cost. To bring the pricing down, Chris split the frame into the front and back sections.
Notice the multiple holes that run parallel with the back section rails. Those are the various points for the L-shaped mounts. In the front section, you’ll see the diagonal holes for the steering wheel mount, and the vertical holes for the monitor uprights. The thick walled carbon steel frame (3.2 cm diameter pipe) is very heavy. Having tried some of the lightweight offerings from name manufacturers of cockpits at E3, the difference in weight is dramatic. It no doubt increases the shipping cost, but it provides a much better product.
 |
For now, lets concentrate on the front section of the frame.
Ask yourself how high/low you like to sit in the chair. What position to the monitor in height and distance. Do you want to go with a centered stick or flanking flight controls? Most importantly, what will you use for your monitor(s)?
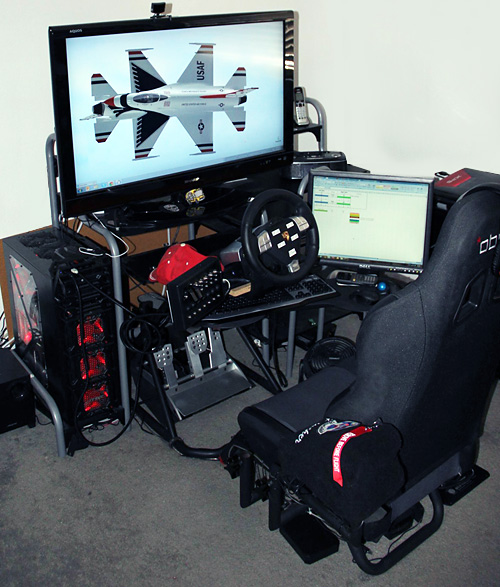
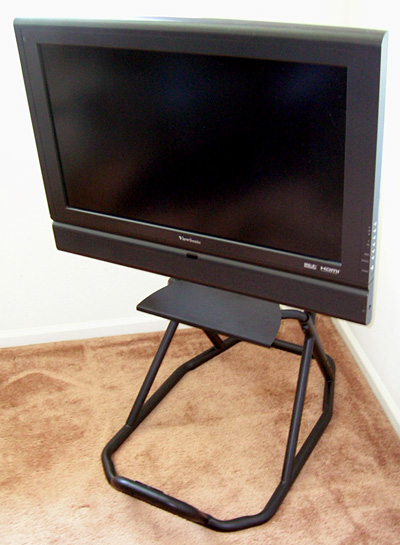
Obutto has a VESA compliant bolt pattern on the back of the included monitor bracket. As is the case in many things electronic, not all manufacturers subscribe to the same standards of compliance. Using a 24″ monitor is no problem. Using multiple 24″ monitors with the optional multi-monitor mount is no problem. But once you get to the 30-32″ monitors, you’d better have checked the bolt pattern or be prepared to do a custom bracket if your monitor isn’t VESA compliant. Even if that is necessary, its not that big of a deal according to the Obutto web site. I have no idea because (fortunately) I didn’t have to pursue that solution.
I did have to do a workaround due to the depth and bulk of the older ViewSonic N3260w TV/monitor combined with my preference of keeping the monitor lower so the viewpoint remained comfortable while playing. More on that later.
A tip. I added rubber fender washers from the local hardware store between the back of my monitor and the mount for each of the four bolts just to keep metal against plastic happy. They were $1 each x4 and good insurance.
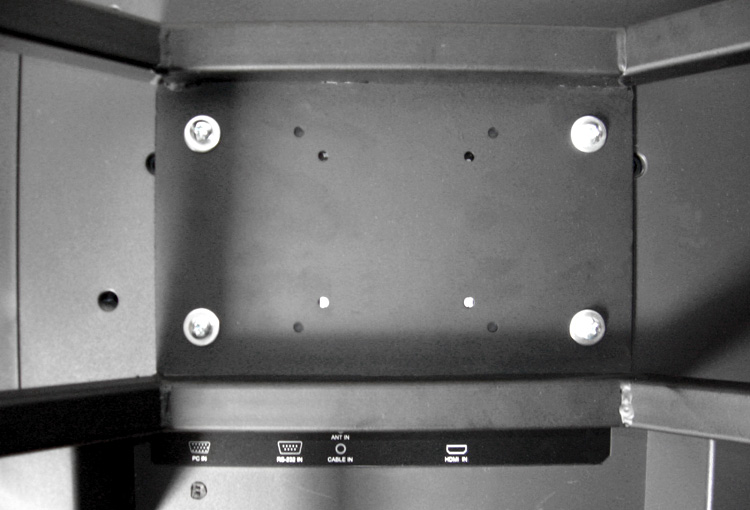
Here is the back of my ViewSonic monitor with the Obutto mount attached. Notice the different bolt patterns. The Obutto mount supports VESA 75mm x 75mm, 100mm x 100mm, or 200mm x 100mm bolt patterns. I’d like to see Chris provide potential and new customers a downloadable PDF template in 100% scale of the bolt patterns on the Obutto web site.
 |
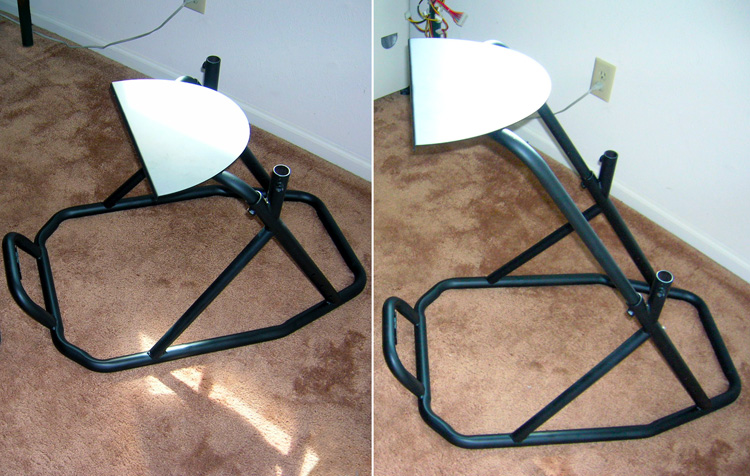
The monster with the uprights in position.
 |
The uprights to the monitor mount attach with the carriage bolt, washer, lock washer, and nut. The uprights have 3 positions to adjust height depending on your monitor size and how straight-up you want to sit in the seat. I used the middle of the three positions on the uprights and the lower position on the monitor. Remember, the seat fully reclines and the distance to the controls are adjustable. Make yourself comfortable for those long flights back to the carrier or to the end of the endurance race.
 |
Things are about to get even more interesting. Below is the steering wheel mount slid into the front frame section in the lowest and highest positions. As you raise it, it gets closer. For fliers, the steering wheel mount is necessary if you use a yoke. If you decide you don’t want to use it for racing, it can be used as the mount for the tabletop, or totally left off the cockpit. Note the vertical holes where the monitor uprights are attached. The steering wheel mount as well as the monitor uprights have the three-prong knobs to tighten down and hold them in place.
 |
Time to attach the monster monitor to the front frame. You vertically slide the uprights into the holes referenced earlier. Be sure and move the uprights around to ensure the monitor is well-seated. In the image below the monitor is lowered to the steering wheel mount surface. It won’t stay like this, but notice how it intersects the back of the steering wheel mount. Yes, there is a nice solution.
For now let’s move to the back frame section.
 |
|
Introduction > The “Sim Cave” > Obutto > Packaging > General Assembly > Tabletop, Pedals and Keyboard/Mouse Trays > Flight Simulation > Sim Racing > Conclusion |
| Go To Page 4 |