Packaging
On delivery day, two very large, heavy boxes arrived at my doorstep. The lighter of the two boxes included only the seat, while the other had the frames and hardware. Both boxes had their contents wrapped in bubble wrapped plastic or smaller boxes. As a kid, I always loved it when the parents received a package that had bubble wrap. I would be entertained for a few minutes just popping the bubbles. After unwrapping the frame of the bubble wrap, I hoped to never see bubble wrap again. I still have nightmares… In all seriousness, the bubble wrap did exactly what it was intended to do — throughly protect the contents during shipment. Given that these cockpits come from overseas, it is an easy solution to protect the frames from damage.
The smaller boxes have numbers on them to coincide with the instructions. The instructions suggest that you do not start opening all the boxes, follow step-by-step, and only open the packages as instructed. This will help you tremendously during the assembly process. One thing to note, the boxes are not numbered in order 1-10 for steps 1-10. For example, you will use box 12 and 2 on Step 1. Why Chris didn’t have these numbered concurrent to each step escapes me.
Assembly (Tips & Suggestions)
If you are an owner of the oZone, you will recall the very simple construction of joining the two main frames pieces together. Probably the most difficult piece on the oZone was aligning up the seat to the lower seat frame. I did not use the monitor mount on the oZone and although I purchased the acrylic tabletop, I never installed that either. Therefore, my time spent constructing the oZone was quick and painless. With the R3Volution, you may want to clear the “honey do” list, set aside half a day for construction, and acquire a second set of strong hands to aide in some of the difficult tasks.
Next, some important information that will help you during assembly.
I would strongly recommend you first watch the introduction videos then the assembly videos at the Obutto YouTube channel before tearing into the assembly of the cockpit. Chris mentions this in the videos, but it is very important for orientation so I will also mention it. The introduction videos are here; the assembly videos are here.
When assembling everything, do not torque anything down. Install all bolts, washers, and nuts finger tight for each step. This will help you when you get to the last few steps. During one of the videos, Chris mentions that you can go ahead and torque everything down. I would strongly advise against that, until you have everything together. I will explain in detail further in the review.
Another piece of information. The instructions that were included in the box I received did not match the hardware contents of the box. Do not be alarmed, Chris goes over this in the videos. In addition, an up-to-date hardware list is available from your retail store. Check your hardware with that list to ensure you have what is required to assemble the R3Volution.
R3Volution: Pedal & Keyboard Trays, Tabletops, and Monitor(s)
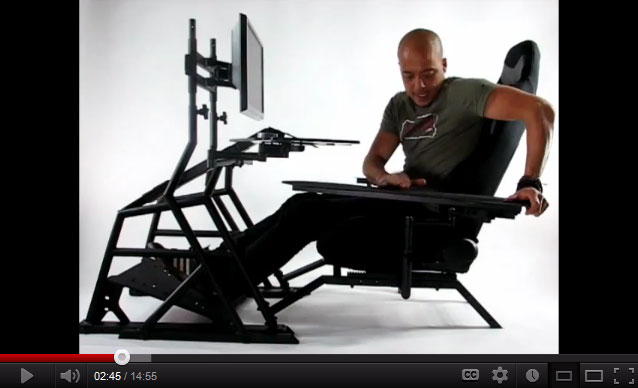
For the sake of the supplied instructions, assembly videos and my review, when “forward” or “aft” is mentioned, it is the sections of the cockpit as if you’re sitting in the seat. Forward being up front where the pedals and steering wheel would be. Aft being the seat and lower seat frame. Initially you start with the forward section of the R3Volution, assembling the left and right side frame together to the center support also known as the center spline. The center spline creates a great anchor point for other non-Obutto accessories: e.g. power strips, USB hubs, etc. It also houses the telescopic wheel or yoke mount, which features pre-drilled holes for all current off the shelf controllers. It also has a VESA pattern so you can install a small monitor if you would like.

The forward section and pedal tray.
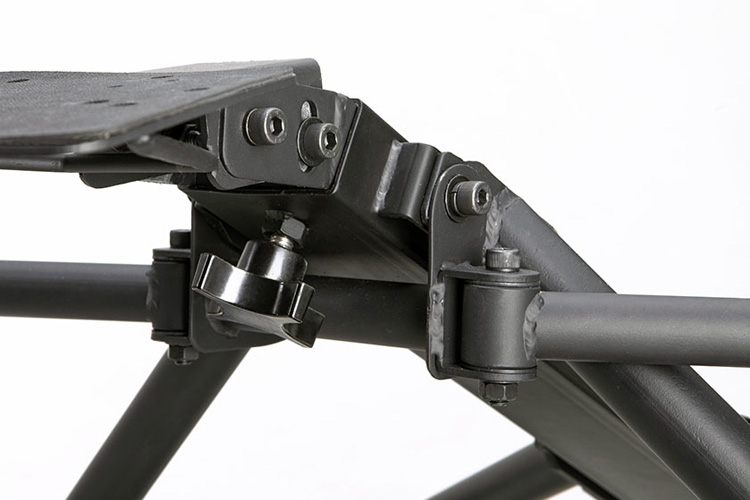
A close-up of the center spline.

The center spline is a good place to attach things.
If you purchased the acrylic tabletops, this is when you will want to install the bracket as well. I did not purchase the tabletops at the same time as the initial purchase of the R3Volution. However, the installation of that bracket was easy and quick even after the pit was fully assembled. I simply broke the torque on all 8-carriage bolts on the spline and removed the four aft bolts to install the tabletop mount bracket.
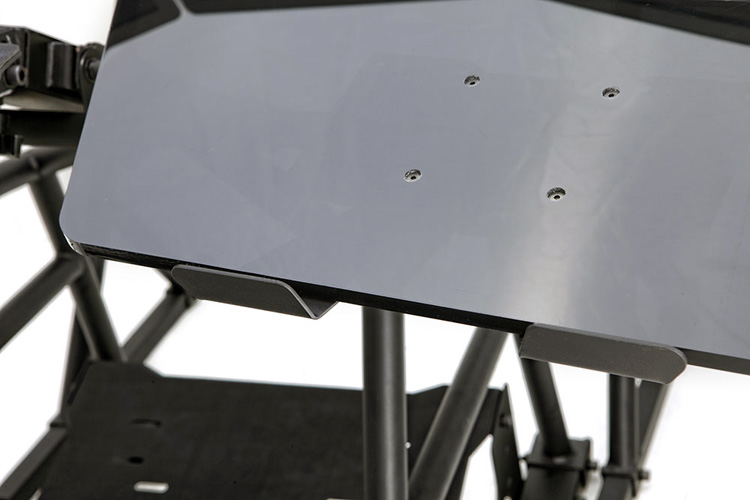
The acrylic tabletop.
Installing the seat to the lower seat rails is where you’ll want an extra set of hands. However, it is possible to install the seat with one person as I did it for the sake of writing this review. I am 6 foot tall so I followed Chris’ sage advice where to mount the seat on the frame, which is in the aft holes on the frame rails. After the seat was installed, it was time to mount up the aft section to the forward section. This part can be a little difficult too. The hardware requirement is a bolt, washer, lock washer, and a nut. However, I was unable to install the nut, as there were not enough threads showing on the bolt for the nut to start. Therefore, I removed the lock washers, and I have not had any issues so far; I do not suspect there to be any issues either.
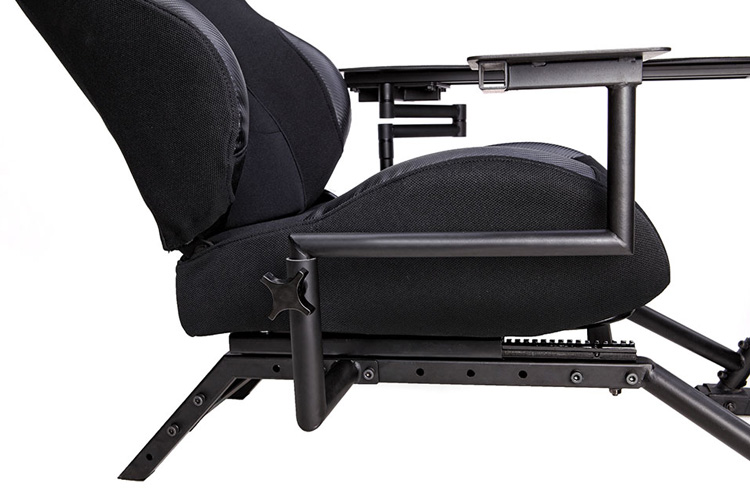
Aft section and seat mounting.
At this point, as both the forward and aft sections are together Chris instructs in the video to torque up everything. I would highly suggest that you wait and install the pedal tray first. If you do not, you may have a hard time installing the aft bolts on the pedal tray. Once you have bolts in both aft section mount holes, then torque up each side of the pedal tray a few turns at a time, to ensure you get equal torque, and a centered forward section along with the pedal tray. After you have the pedal tray installed, go back and torque up the entire cockpit. Do not forget any bolts, and double-check your mount bolts for your seat.
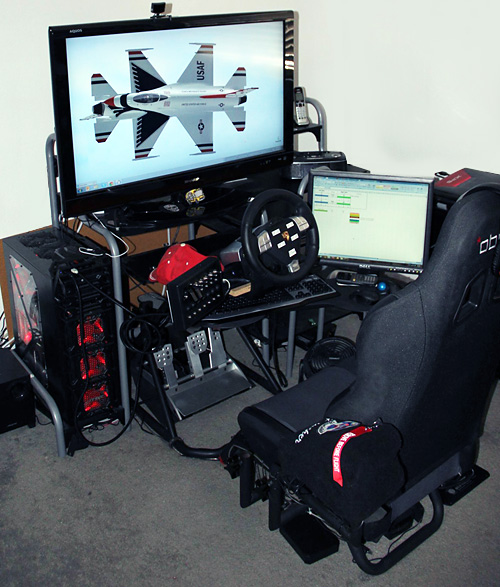
Depending on your situation, you may want to assemble the monitor mount assembly. This assembly was a breeze; however, I had to fabricate a solution for my enormous 40″ LCD monitor to mount up to the R3Volution LCD bracket. At first, I thought I could just purchase a wall mount for my monitor and just install it to the plate on the R3Volution. I quickly discovered that would not be possible due to the size of my monitor and its VESA pattern. What I had to do was use a piece of wood to mount the R3Volution VESA plate to, which I then mounted the LCD wall mount to the other side of the wood. Problem resolved after a quick trip to the hardware store and a few dollars later.

My “custom” monitor mount.
One of my favorite additions to the R3Volution is the articulating keyboard tray. On the oZone, the keyboard tray swiveled at a single point — the L-shaped bracket on the side of the seat. With this single swivel point design, you were limited to where you could mount the bracket and still get full use out of the keyboard tray. With the articulating tray, there are several more options available on where one can mount the bracket to hold the arm. For myself, when I am in FPS gamer mode, or I’m just browsing the net I can really manipulate the keyboard tray to where I want it. Before on the oZone it was always, close in terms of where I wanted it but not perfect as it had limited movement.
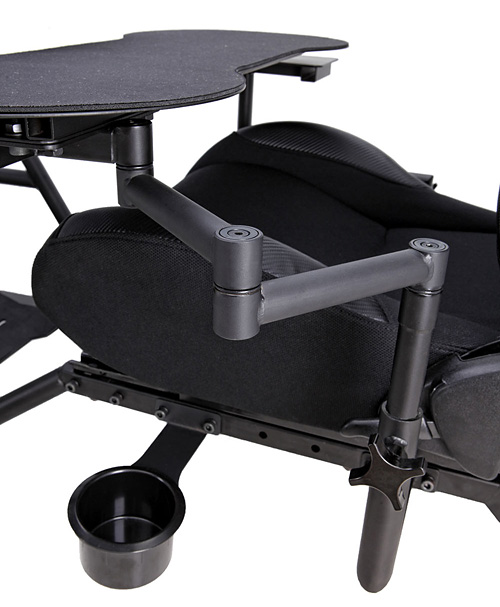
Articulating keyboard tray (and cup holder).

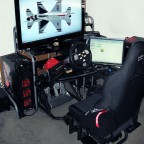
My configuration.
Just like the oZone, the R3Volution uses the same L-shaped brackets to mount to the lower seat rails. These brackets hold all of your Obutto accessories in place and features a knob that can be tighten to prevent unwanted movement from the mountable accessory. The standard R3Volution package ships with the keyboard tray with articulating arm, a shifter mount, 2 L-shaped brackets, and a single-monitor mount that also features an articulating arm. If you are an oZone user, all of your accessories can be used on the R3Volution. You do not have to worry about buying the new mounting hardware because while the base unit was upgraded, the mounting design remained the same.

The mounting plates are interchangeable with the oZone. Shown here with the flight controller accessory package.