General Info
As in real life, it helps to have a stable aircraft platform when operating the radar. When we are “heads down” in the scope, we would like the plane to remain in the attitude where we left it. The absence of trim control in SFP1 makes this task more difficult than it should be. This is true of both the Normal and Hard difficulty levels…in the Easy level, trim is not a factor. The aircraft in this game are “trimmed” for an average cruise speed, one that is relatively low when compared to typical combat speeds…for example, the F-4E in Normal mode is “in trim” at about 400KIAS. Go slower than this speed, and you will sense that the stick is “heavy” and you will have to pull back slightly to hold the nose level. At speeds above 400KIAS, you will find that the nose wants to “rise”, and you will have to push forward to keep the nose level. This effect becomes more pronounced as speed increases or decreases from the “trimmed” speed.
This can cause unnecessary difficulty when attempting to get a lock-on. The location of the elevation scan in Easy mode should not be a problem as far as the illumination of the target is concerned. You can allow the nose to point above or below the target by a considerable amount and still be able to see a target return.
This is not true of operating the radar in Normal or Hard levels. Here, the elevation position is very important. The radar beam must be pointed at or close to the target in order for you to see a return on the scope. Pointing the gunsight reticle at a visual target is one way to help to keep the radar beam on the target. But what if the target is not visible? Now you have a potential problem. The reason for this will be the tendency of the nose to drop or rise if you are not at the “trimmed” speed. When this happens, and you have your attention on the radar scope, you will find that it is easy to unconsciously allow the nose to change its position…and when this happens the radar beam may well move off the target. If it does, you lose your target return. So, watch your pitch attitude closely when trying to lock up a target and remember how trim can make this more difficult.
One technique to use to minimize this is to fly at the “trimmed” speed. In my flying, I have found the “trimmed” speeds to be about 400KIAS for the F104 and F-4. While the A-4 and F-100 do not have attack radars, their “trimmed” speeds are about 300KIAS and 375KIAS, respectively.
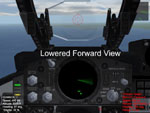
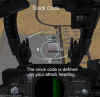
The search beam is about the size of the diameter of the gunsight reticle. If you are searching for a target that is not visible, raise or lower your nose by one to two reticle diameters at a time. Let the beam cycle back and forth at least 1-2 times before you move the nose to position the scan again. Remember the effect of trim and make sure you keep your nose steady. One way to do that is to lower the forward view using the mouse so that you can see the scope and the gunsight together more easily.
General Weapons Employment Considerations
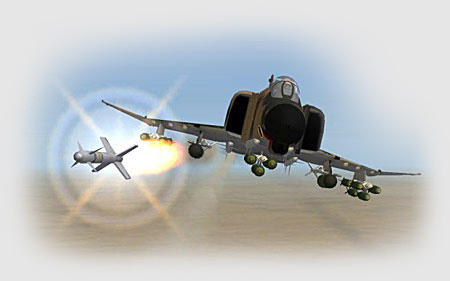
You have three different types of A2A weapons systems to use in SFP1…radar guided missiles, infrared guided missiles (heat seekers) and the gun. The missiles come in a variety of models…which ones you use will depend on the model of aircraft you are flying and the part of the game that you are flying in. For example, if you are flying a F-100, you will be limited to early model AIM-9s because that aircraft represents a non-radar equipped fighter from the 1950s. Fly a F-4E, and you will be able to carry the later model radar and heat-seekers commonly found in the latter part of the 1960s. In the initial segments of campaign play, you will be likewise limited to the older model aircraft and weapons types.
In this section, we’ll take a look at the procedures and techniques on how to best use these weapons. Let’s begin some info on how the missiles are modeled in this game. The following chart (from the game’s weaponsdata.ini file) shows comparative values for a number of missile performance parameters. The actual units of these values are not as significant as are the relative numbers. In the following brief discussion of these missiles, I’ll use these values to draw some general conclusions about what kind of performance you can expect in the game.
|
Missile |
Accuracy | Max Turn Rate |
Max Launch G |
Launch Reliability |
Seeker Track Rate |
Min/Max Launch |
ECCM |
|
AIM-4D |
60 | 14 | 2 | 60 | 11 | 1.5/9.6 | 40 |
|
AIM-9B |
60 | 10 | 2 | 75 | 11 | 0/4.8 | 10 |
|
AIM-9E/E-2 |
75 | 11 | 2.5 | 80 | 16.5 | 0/8.0 | 20 |
|
AIM-9J |
85 | 22 | 7 | 90 | 16.5 | 0/14.0 | 40 |
|
AIM-7D |
60 | 10 | 2.5 | 75 | 12 | 6.0/15.2 | 10 |
|
AIM-7E |
70 | 10 | 2.5 | 85 | 12 | 6.0/30.0 | 20 |
|
AIM-7E-2 |
80 | 15 | 5 | 85 | 16 | .6/24.0 | 20 |
General Comments On Missile Capability
The AIM-4D Falcon. The Falcon is used on the F-4 and is a heat seeker. As it was in real life, the Falcon’s performance in the game is not as impressive as most of the other missiles. When compared to the AIM-9, these parameters are poor: overall accuracy, max launch G, seeker track rate, and minimum range. These numbers reflect a missile that will perform below average in a close-in, turning fight. The missile should be more effective against non-maneuvering targets, such as bombers.
One note…the real life Falcon had a short and troubled service in combat. Its firing logic and procedures were more suited to air defense interceptors than tactical fighters. While these firing procedures were cumbersome and difficult to use in a fluid combat environment, none of that is modeled in SFP1.
The AIM-9 Sidewinder Series. The AIM-9s are used on all the original aircraft in the game. The A-4 and F-100 will likely be armed with the B model, while the F-104 and F-4 models will often use the later model missiles.
The AIM-9B is a very poor performer, probably the least effective A2A missile in the game. It’s low accuracy, low launch G, poor turning performance, short range, and susceptibility to flares (ECCM) make it of little value in a turning fight. Like the Falcon, the AIM-9B is best used against non-maneuvering targets.
The AIM-9E and E-2 are improved over the B model. As the chart shows, the missile’s accuracy, turn performance, longer max range, and better flare rejection capability make it a better performer. However, the E and E-2 models should not be used in aggressive maneuvering engagements as is indicated by its low max launch G. Instead, the missile has an improved launch reliability and has a better max range, particularly at low altitude and high speed.
The AIM-9J is the clear winner in the Sidewinder series. It is a true “dogfight” missile as its improved turn performance numbers show. The significant increase in max launch G means that you have a reasonable chance of engaging hard turning targets with this missile.
The AIM-7 Sparrow Series. In this sim, you will use three types of Sparrow missiles…the D, E, and E-2 models. The D model is the oldest variant and is used on the F-4C and F-4D in earlier mission scenarios. In later missions, you will use the E and E-2, primarily on the F-4E.
The AIM-7D suffers from relatively low accuracy and launch reliability. Its low launch G and relatively long minimum range limit its usefulness in a close-in turning fight. Use this missile at long range and against non-maneuvering targets.
The AIM-7E is not much of a step forward. Expect the same limited capability against turning targets. Its expanded maximum range means that you have a better chance against medium to high altitude targets, particularly in the front aspect.
On the other hand, the AIM-7E-2 is a considerable improvement over the earlier models. The “dogfight” label that this missile was given is a little misleading. Do not expect “AIM-9J” type performance from the E-2. But you can expect better results in a close-in turning fight. Most important are the improvements in minimum range, accuracy and reliability, and max launch G.
Specific Employment Tips and Techniques
We’ve covered the basics of radar operation, game symbology, and taken a brief look at general missile performance. In this last section, we’ll learn about specific tips and techniques intended to improve your chances of bagging that bandit!
In doing that, I’ll focus on two areas of interest…”in the cockpit” things (switchology, radar use, etc) and “out of the cockpit” things (range, angle off, G, etc).
Related Posts:
Related posts:
 A2A Weapons Delivery In Strike Fighters
 Page 3
A2A Weapons Delivery In Strike Fighters Page 4
A2A Weapons Delivery In Strike Fighters
A2A Weapons Delivery In Strike Fighters Page 3
A2A Weapons Delivery In Strike Fighters Page 4
 Strike Fighters: Project 1, SP1 Patch Page 2
Strike Fighters: Project 1, SP1 Patch Page 4
Strike Fighters: Project 1, SP1 Patch Page 7
Strike Fighters: Project 1, SP1 Patch Page 2
Strike Fighters: Project 1, SP1 Patch Page 4
Strike Fighters: Project 1, SP1 Patch Page 7
 Techniques For Weapons Delivery In SFP1
 Page 2
Techniques For Weapons Delivery In SFP1
Techniques For Weapons Delivery In SFP1 Page 2