On the Black Shark
The Ka-50’s targeting computer is preprogrammed with the trajectory of each type of rocket and can more or less accurately predict the impact point (given a perfect trajectory) on the ground, enabling the pilot to put rockets on target. The predicted impact point shows on the HUD as a circle with a dot at the center.
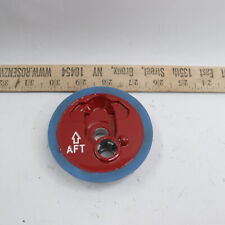
Due to differences in overall weight, motor performance, aerodynamic characteristics, etc., each rocket type has a different flight trajectory that results in very different impact points for the same launch conditions. Unfortunately, the Ka-50’s targeting system isn’t smart enough to automatically determine what type of rocket is selected. The pilot has to dial in the rocket type via a selector dial on the back panel so the targeting computer can reproduce the correct trajectory.
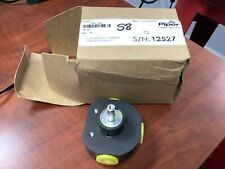
The dial settings for the available rocket types are shown below:

Rocket selector dial on aft panel of the Ka-50.
And the Twist
Of course, it’s never that easy, right? Even with fins and spin stabilization, an unguided rocket’s actual trajectory will vary from the predicted due to a number of unpredictable factors, creating a scatter pattern of impact points around the desired point of impact.
This scattering is even more pronounced at shallow angles due to a phenomenon known as the Flashlight Effect. A steep trajectory concentrates the unguided rockets into a small impact area while a shallow trajectory spreads them out, much like the photons from a flashlight hitting the floor or wall at an angle. And this isn’t a small effect: given the same slant range and dispersion rate, a 45° diving rocket delivery puts the same number of rockets into an area one quarter the size of the area from a 10° dive. Even a modest 20° dive has half the impact area as the 10° dive, greatly increasing the chance of a direct hit on target.
The Flashlight Effect (Not to be confused with The Butterfly Effect).
Unguided Rocket Delivery
Enough of the blah, blah, blah, you say? How do you shoot ’em? Well, here ya go.
1. Arm the system. Flip the Master Arm switch to Armed and the Laser switch to Standby. We’ll use the laser later to get a precise range to the target, improving the accuracy of the impact prediction. To ensure a clean slate, reset the targeting system.

Arm the system.
2. Select the rockets. Select the outer, inner, or all four stations to bring the rockets up in the targeting computer. Note that the Ka-50 targeting system won’t fire two different kinds of rockets at once. If you select stations that have multiple rocket types loaded, it will shoot only the rocket type from the left-most station first.
3. Set burst mode. The more rockets you send, the more likely you are to score a lethal hit. There’s nothing more annoying than making a mad dash at a vast column of supply trucks and seeing only two rockets fly out of your pods. Of course, it’s also no good to accidentally send half your smoke rockets at one single enemy location. Make sure you’ve got the right burst mode for the rocket and the target before you begin your attack run.
Burst selector switch.
The number of rockets that are launched per canister for each burst selection mode (short, medium, or long) depends on the rocket size, per the table below:
| Short | Med | Long | |
| S-8 | 1 | 5 | 10 |
| S-13 | 1 | 2 | 5 |
4. Lock onto the target or the ground near the target. This step is technically optional, but using the Shkval and the onboard laser to measure the distance to the target greatly increases the accuracy of the impact prediction reticle. Without an accurate measurement, the predictor assumes a distance to the target of 1 km.

Without laser ranging on the left, with laser ranging on the right.
5. Don’t fight the autopilot. During your attack run you will be making minor changes to the helicopter’s attitude to put the pipper on target. The autopilot feedback channels will be providing input in the EXACT OPPOSITE direction, as it’s trying to maintain the last commanded attitude! Turn on the Flight Directory autopilot mode or hold down the Trimmer button during your attack run to disable this feedback and reclaim more precise control of your helicopter’s attitude.
6. Make your attack run. Keep your speed up but give yourself plenty of time to line up the shot, too. Snapshots are inaccurate shots, something that can’t be afforded with unguided weapons. If you are making a diving attack (see the Flashlight Effect above), decide whether you want to fly in low and pop up near the target, or fly in at a high altitude and dive down. When planning your attack run it’s always a good idea to keep your egress options in mind, too. During the run in, use the Shkval and laser to make one last range update to ensure the best impact prediction point you can get.
7. Let ‘er rip! Press and hold that weapon release button [‘rAlt+space’] and watch the rockets fly off towards your target (sorry, bro).

This’ll teach those kids to stay off my lawn!
8. Egress. If you did things right, at this point you are close to your enemy and, if they’re still alive, they’re pretty pissed. Besides, overflying a bunch of dudes with guns that you just shot at is, in general, a bad idea. Dump flares and get out of there, but be wary of intersecting rotor cones!
Now that you know how to deliver unguided rockets go and practice accurate deliveries. Good luck!
Author’s System Specs
- ASUS P6X58D-E Motherboard
- Intel i7 950 CPU (stock)
- EVGA GTX 470 video card
- 6 GB DDR3 RAM
- Western Digital 300 GB Velociraptor HDD
- Saitek X52 Pro HOTAS
- CH Pro Rudder Pedals
- TrackIR4 PRO
Watch for the next DCS: Black Shark Technical Report
on the Shipunov 2A42 30mm semi-rigid cannon.
Previous SimHQ DCS: Black Shark Technical Reports
DCS Black Shark: Employing the Vikhr – Part 1
DCS Black Shark: Employing the Vikhr – Part 2
DCS: Black Shark: Technical, Simplified
DCS: Black Shark and Coaxial Rotor Aerodynamics
DCS: Black Shark and the Trimmer
DCS: Black Shark – Autopilot: Part 1
DCS: Black Shark – Autopilot: Part 2
DCS: Black Shark – Preview 1
DCS: Black Shark – Preview 2
DCS: Black Shark – Preview 3
Para_Bellum’s excellent DCS: Black Shark tutorial
“How to Take Off and Blow Stuff Up”
SimHQ’s DCS: Black Shark Review (RC8)
Part 1 Part 2 Part 3
SimHQ’s DCS: Black Shark Interview
Producer Matt Wagner discusses DCS: Black Shark
Other SimHQ DCS: Black Shark Feature Articles
A Stick and Rudder Man’s Guide to DCS: Black Shark
More on Controllers in DCS: Black Shark – English Version
We want your Feedback. Please let us know what you thought of this article here.
Related posts:
 Air to Ground, Part Three – Rockets and Guns Page 3
Air to Ground, Part Three – Rockets and Guns Page 4
Air to Ground, Part Three – Rockets and Guns Page 5
Air to Ground, Part Three – Rockets and Guns Page 7
Air to Ground, Part Three – Rockets and Guns Page 8
Air to Ground, Part Three – Rockets and Guns Page 3
Air to Ground, Part Three – Rockets and Guns Page 4
Air to Ground, Part Three – Rockets and Guns Page 5
Air to Ground, Part Three – Rockets and Guns Page 7
Air to Ground, Part Three – Rockets and Guns Page 8
 Mavericks, Rockets, and the Gun Page 5
Mavericks, Rockets, and the Gun Page 6
Mavericks, Rockets, and the Gun Page 5
Mavericks, Rockets, and the Gun Page 6
 Unguided Rockets