Flight Systems
First off, know where the gear indicator lights are (next to the RPM gauge), and that green means down and red means up. The “G” key is the default for raising and lowering it. If one’s helicopter is flying really rough and just plain weird, check to see that the gear isn’t still down. Similarly, if one performs a really good descent onto the FARP only to find they keep falling to the side and losing rotor blades on landing, chances are the gear was up.
The stick is probably the least understood control in the helicopter, as it is responsible for slip and slide as much as (and probably more than) the rudder. In the Ka-50, the tail rotor is replaced by the twin rotor setup, with the pedals moving the center of gravity around the axis of the blades, but it’s the same principles at work. The rudder doesn’t actually turn the aircraft; it rolls the aircraft and assists in rotating the helicopter. More on this later, I promise.
In fixed wing aircraft, thrust is straight back along the airframe at all times, so slip (flying with the nose pointed in a direction other than the way the aircraft is going) and slide (flying sideways) is the fault of the rudder not being coordinated with the wings. In a helicopter, the “lift cone” that determines direction of flight can be moved in all points of the compass, meaning we can apply thrust in a direction that isn’t along the axis of the aircraft.
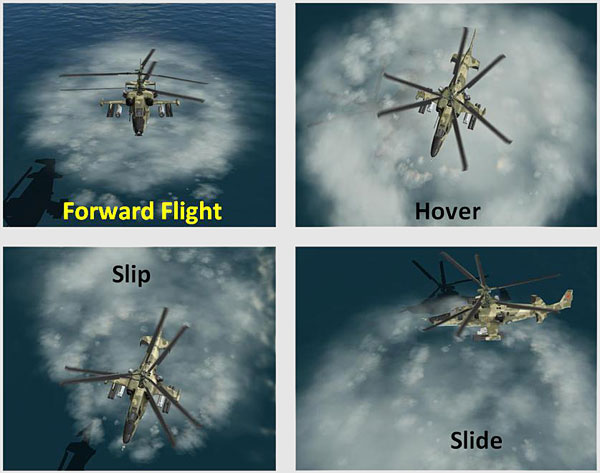
Flight Cones
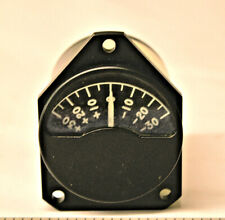
There’s a “nav” mode in the HUD that has a little line that shows slip and slide, pointing the direction out with the length of the line indicating the speed of off direction. There’s a much easier set of tools to use for determining how one is doing on a hover: the “V” of the window and the turn and bank indicator’s ball.
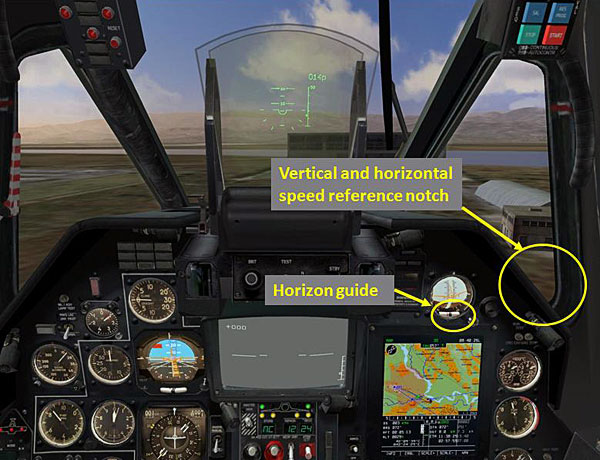
Hover Notch
Don’t underestimate the value of looking out of the windows at the ground and reference points; we’ve got tens of thousands of years of experience built into us for detecting motion. What our ancestors used for aiming a thrown rock at a running rabbit works just as well for determining straight and level flight as well as the hover.
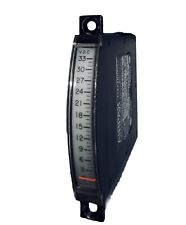
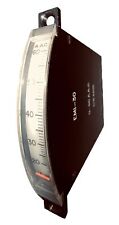
The “V” of the front side windows frame objects on three sides and makes determining drift very easy. It’s also a quick glance to check to see if the ball is centered. If one likes to glance at the variometer, use the “V” notch on the left of the cockpit. If objects in the front windows are moving towards one, one is going forward. If they are moving away, one is flying backwards. If they appear to be rising against the window, one is descending, and the inverse is true. The variometer and airspeed indicator are handy double checks, but the Mark One Eyeball just can’t be replaced when at low altitude.
On the turn and bank indicator, if the ball is to the left, one is slipping to the left. This is best corrected with the stick, NOT the pedals, as it’s a matter of us applying thrust in the direction of the slip.
That may seem like a pretty radical statement, but hear me out before howling. Most of the time the helicopter starts out (or is set) trimmed with the pedals in the neutral position, and it’s the stick that is “re-centered” for hands off flight. Slip is first induced because we’re pushing the helicopter with the rotor’s tilt slightly left or right of center as well as forward (or even at the near hover). One of the things the tail does is roll the helicopter, which works against the tilt of the rotor. You get a non-slip flight because one control surface (the rudder) is forcing a correction for the setting of another (the rotor). It’s not the best way to do business, as we’re constraining range of motion for our controls for normal maneuvering and have a greater opportunity for uncontrolled flailing about the air when we start untying the mess we’ve made.
Pedals Versus Rudder
Let’s take a break and talk about the difference. In the Ka-50, rotation of the aircraft is handled two ways — the pedals to adjust the blade pitch of one of the rotors causing a gyroscopic effect that points the helicopter in another direction, causing a gyroscopic effect that points the helicopter in another direction, and the rudder, which applies roll to the aircraft in order to coordinate a turn (keeping the axis of the aircraft pointed along the curve of that turn to avoid sliding) when moving forwards or backwards.
When at a hover or at low speeds, the rudder at the back is simply going along with the pedal inputs. What’s making the helicopter rotate about is one rotor spinning either faster or slower than the other.
We can also make some really nice sliding maneuvers using the pedals. Tilt the rotor to one side and applying the pedal in the same direction will keep the tail moving in lateral direction of the helicopter, playing catch up and making us crab walk nicely.
This brings us to one of the favorite topics of DCS: Black Shark, trimming the Ka-50.
Trimming the Ka-50
Adjusting trim is no more than establishing a new “center” for our controls that deliver a consistent flight profile for a particular throttle, collective, and pedal setting. No more, no less.
Lots of folks will say to adjust trim continuously, making each profile of flight the new “natural” state of controls and engine, but I heartily disagree. It’s probably true that the real Ka-50 pilots adjust trim continuously on what for them is an instinctual basis due to lengthy training, but they have a lot more at stake in the game that we do. And their sticks and rudders hold position from the trim so that they are well aware they’ve set the stick well forward and slightly to the right or left simply by sight and touch.
The centering springs on our joysticks make trim a big fat lie, as one has to mentally remember where the stick has been adjusted to.
I trim to as close to a hover as I can with an altitude of about ten meters; that’s the collective between a third and a half the way up, and leave it there. The disadvantage is that I must apply control to the helicopter in any flight profile that isn’t a hover condition with the collective and throttle at those settings. I burn more fuel than my trim happy cohorts, as constant changes to the controls means more drag. The advantage is that when I get ready to attack, I simply slow down, put the collective at the “trim setting” I’ve established, and pretty much hands-off hover without any automatic pilots to worry about. It’s a trade off, but it makes flying and fighting a whole lot easier for me, as I can set up and begin engaging targets with my head up to scan the horizon with quick glances at the Shkval screen very quickly. And if I need to “get out of Dodge”, there’s nothing to disengage.
I use the “two punch” method of trim, which follows the “old” way of trim implementation. With the v1.01 patch / upgrade, there is a new way of trimming the helicopter, but after all the effort I took to learn it the original way, I sticking to it. After takeoff I place the lower “10” on the horizon, ball centered, neutral rudder, tap the trimmer key (“T”), and immediately press the stick forward. The nose will rise quickly, as it’s resetting from the ground default trim. I then put the lower “10” in the HUD back on the horizon, get the ball centered, and check the ground for lateral motion. Adjust the stick forward and back for the smallest airspeed I can manage, keeping the ball centered, and tap the trimmer again — and then let the stick go back center immediately.
One has to pay attention to the briefing on wind speed and direction. I usually let the aircraft rotate (no rudder), as it’s not a control issue so much as a wind-pushing-the-tail issue, and getting it level is the important thing. If the wind is at 5 KPH to the north and I’m drifting at the level to the north at 5 KPH, no correction required for a “hover trim.” I can dink the stick and rudder slightly to keep pointed in the right direction and overcome the wind when I set up to engage, bumping the trim if I think I’m going to be there for more than a minute or two. Trimming in wind for a rock solid hover only works when the helicopter is pointed in the same direction in relationship to the wind later on.
I also have the “undo trim” button programmed on my X52Pro for when I make a convoluted set of control settings that make controlled flight impossible. Sometimes it’s just best to zero it all out and give yourself a mulligan. The real Ka-50 doesn’t have this feature, but it doesn’t need one, as (again) the pilot’s controls are stuck in the trimmed position while our sticks and rudders bounce back to the center due to springs.
Why all the paragraphs about trim? Because when the helicopter is trimmed to the hover, I can ignore autopilots.
Autopilot
Autopilot is evil. They are the path to Sloth, and that is the road to Hell.
Okay, seriously, the autopilot functions in the Ka-50 are there for a good reason — to give a pilot the chance to concentrate on the systems that make his aircraft an electronics and weapons platform.
The truth for me is that I have invariably fought with the autopilots and been hindered more than helped by them. The Auto Hover and the Turn to Target were the largest source of swear words in the simulation for me until I simply began to ignore them.
I simply trim to the hover and turn towards targets manually; if it’s never turned on I will never have to figure out why it is that I can’t get it to turn off. In the case of the auto hover, it will turn off the dampening features if one goes below 14 meters altitude and turn off all the dampeners that go with it! Those dampeners are very important, as they make the helicopter much easier to fly, smoothing one’s controls.
 A perfect hover isn’t always a good thing. In fact, I think it’s a very, very bad thing. While my four KPH slide that keeps my nose pointed at my target means I also have to look carefully at my surrounding to make sure I don’t drift into a building or hillside, it also spoils the aim of those guys shooting wire guided optically aimed anti-tank rockets at me.
A quick word on dampeners, though, as they’re often confused with autopilots: leave them on, as they’re basically smoothing out your controls and making the helicopter much more manageable when in manual flight. Only use the ones lit up; the rule of thumb is to simply leave that whole section alone!
While I’m sure there is much to gain from autopilots, it seems to me that I can do every single thing the smart guys do with the computer within the simulation flying the bird — but without having to read the manual and ask a lot of questions on forums on how to turn the darned things off, or, more importantly, how to react when they turn themselves off.
Related Posts:

Related posts:
 A Stick and Rudder Man’s Guide to DCS: Black Shark
 Page 3
A Stick and Rudder Man’s Guide to DCS: Black Shark Page 4
A Stick and Rudder Man’s Guide to DCS: Black Shark
A Stick and Rudder Man’s Guide to DCS: Black Shark Page 3
A Stick and Rudder Man’s Guide to DCS: Black Shark Page 4
 DCS: Black Shark and Coaxial Rotor Aerodynamics
 DCS: Black Shark – Autopilot: Part 1
 DCS: Black Shark – Autopilot: Part 2
 DCS: Black Shark and the Trimmer
 DCS: Black Shark… Technical, Simplified